I had the very best of intentions, to write up this post yesterday and keep up my early blog momentum. (Thanks so much to all of you who read, liked and commented on my first post! It was so encouraging!) However, as I often do, I got a bit carried away with projects and allowed my enthusiasm to overshoot my energy. Yesterday was the perfect day for marmalade making, as we had a Spring blizzard here in central Alberta. But it was also the perfect and only day for me to get some chicken stock into the pressure-canner, as it had simmered on my stove for long enough. That meant I also had to drive into town to buy some one litre canning jars. And then I remembered that I wanted another gallon jar for kombucha, as the one I already own is now full of my homemade liquid soap… All this is to say that the day got away from me a bit, and I realized at 9:00 PM that I was much too tired to do anything but fall into bed with a good book and a snuggly St. Bernard.
I have told you that my entree into the world of making started with cooking and with my favourite cookbook of all time, How to Cook Everything by Mark Bittman. My mom is not a great cook, and though she is a teacher by profession, she was not the right teacher for me. She was also not a preserver. I didn’t even realize that preserving food at home was a possibility until I played soccer with a girl from an Italian family. At her house for a social event, I was transfixed by the shelves of home-canned tomatoes and sauces in the basement where we had been sent to play. I thought though, that the knowledge to keep food in this way must be only passed down through families with nonnas and aunties and long histories of putting food by. It wasn’t something for me. I forgot all about preserving until I was an adult. My husband, my daughters and I moved into a house on the Sunshine Coast of BC that had two beautiful plum trees and tangles of blackberry brambles. We were inundated with gorgeous fruit that first summer, and my baking couldn’t keep up. I didn’t want a single plum or berry to go to waste, so I started thinking about canning. Fortunately for me, the worldwide web had become a reality while I was in university, and I wasn’t confined to my own library for information and resources. That summer, I learned to make jam and chutney — oh, how I love plum chutney — and I learned to love the canning process.
There are so many food preservation resources these days, and one of my very favourites is the extensive and exhaustive website, Food in Jars, created by the lovely Marisa McClellan. If you are new to canning, or if you are looking for a recipe for a particular fruit or vegetable, I cannot recommend this site more highly. Marisa also has all the information you need to ensure that you are following safe canning practices, which is very reassuring for those of us convinced that our incompetence might result in poisoning our family and friends! Being the bookish person that I am, of course, I also bought her first book (also called Food in Jars), as soon as it came out; I might own her entire oeuvre these days… The first real project I am excited to share here is from Marisa’s first book — Blood Orange Marmalade. Here’s a slightly different recipe from her blog — it’s not my place to share her book recipe, and this post will focus more on method than on the specifics.
Like any good child of British heritage, I was brought up on the Paddington Bear books, and on marmalade. Given a choice between any jam and marmalade on my morning toast, I will always choose the marmalade. I don’t have much of a sweet tooth, and I absolutely adore citrus. I have never carried a suitcase of the preserve across oceans, on an international sea voyage, but I would consider it! (I also envy Paddington’s beautiful duffel coat and his boots, but he can keep his hat. The only hats that suit me are knitted ones.)
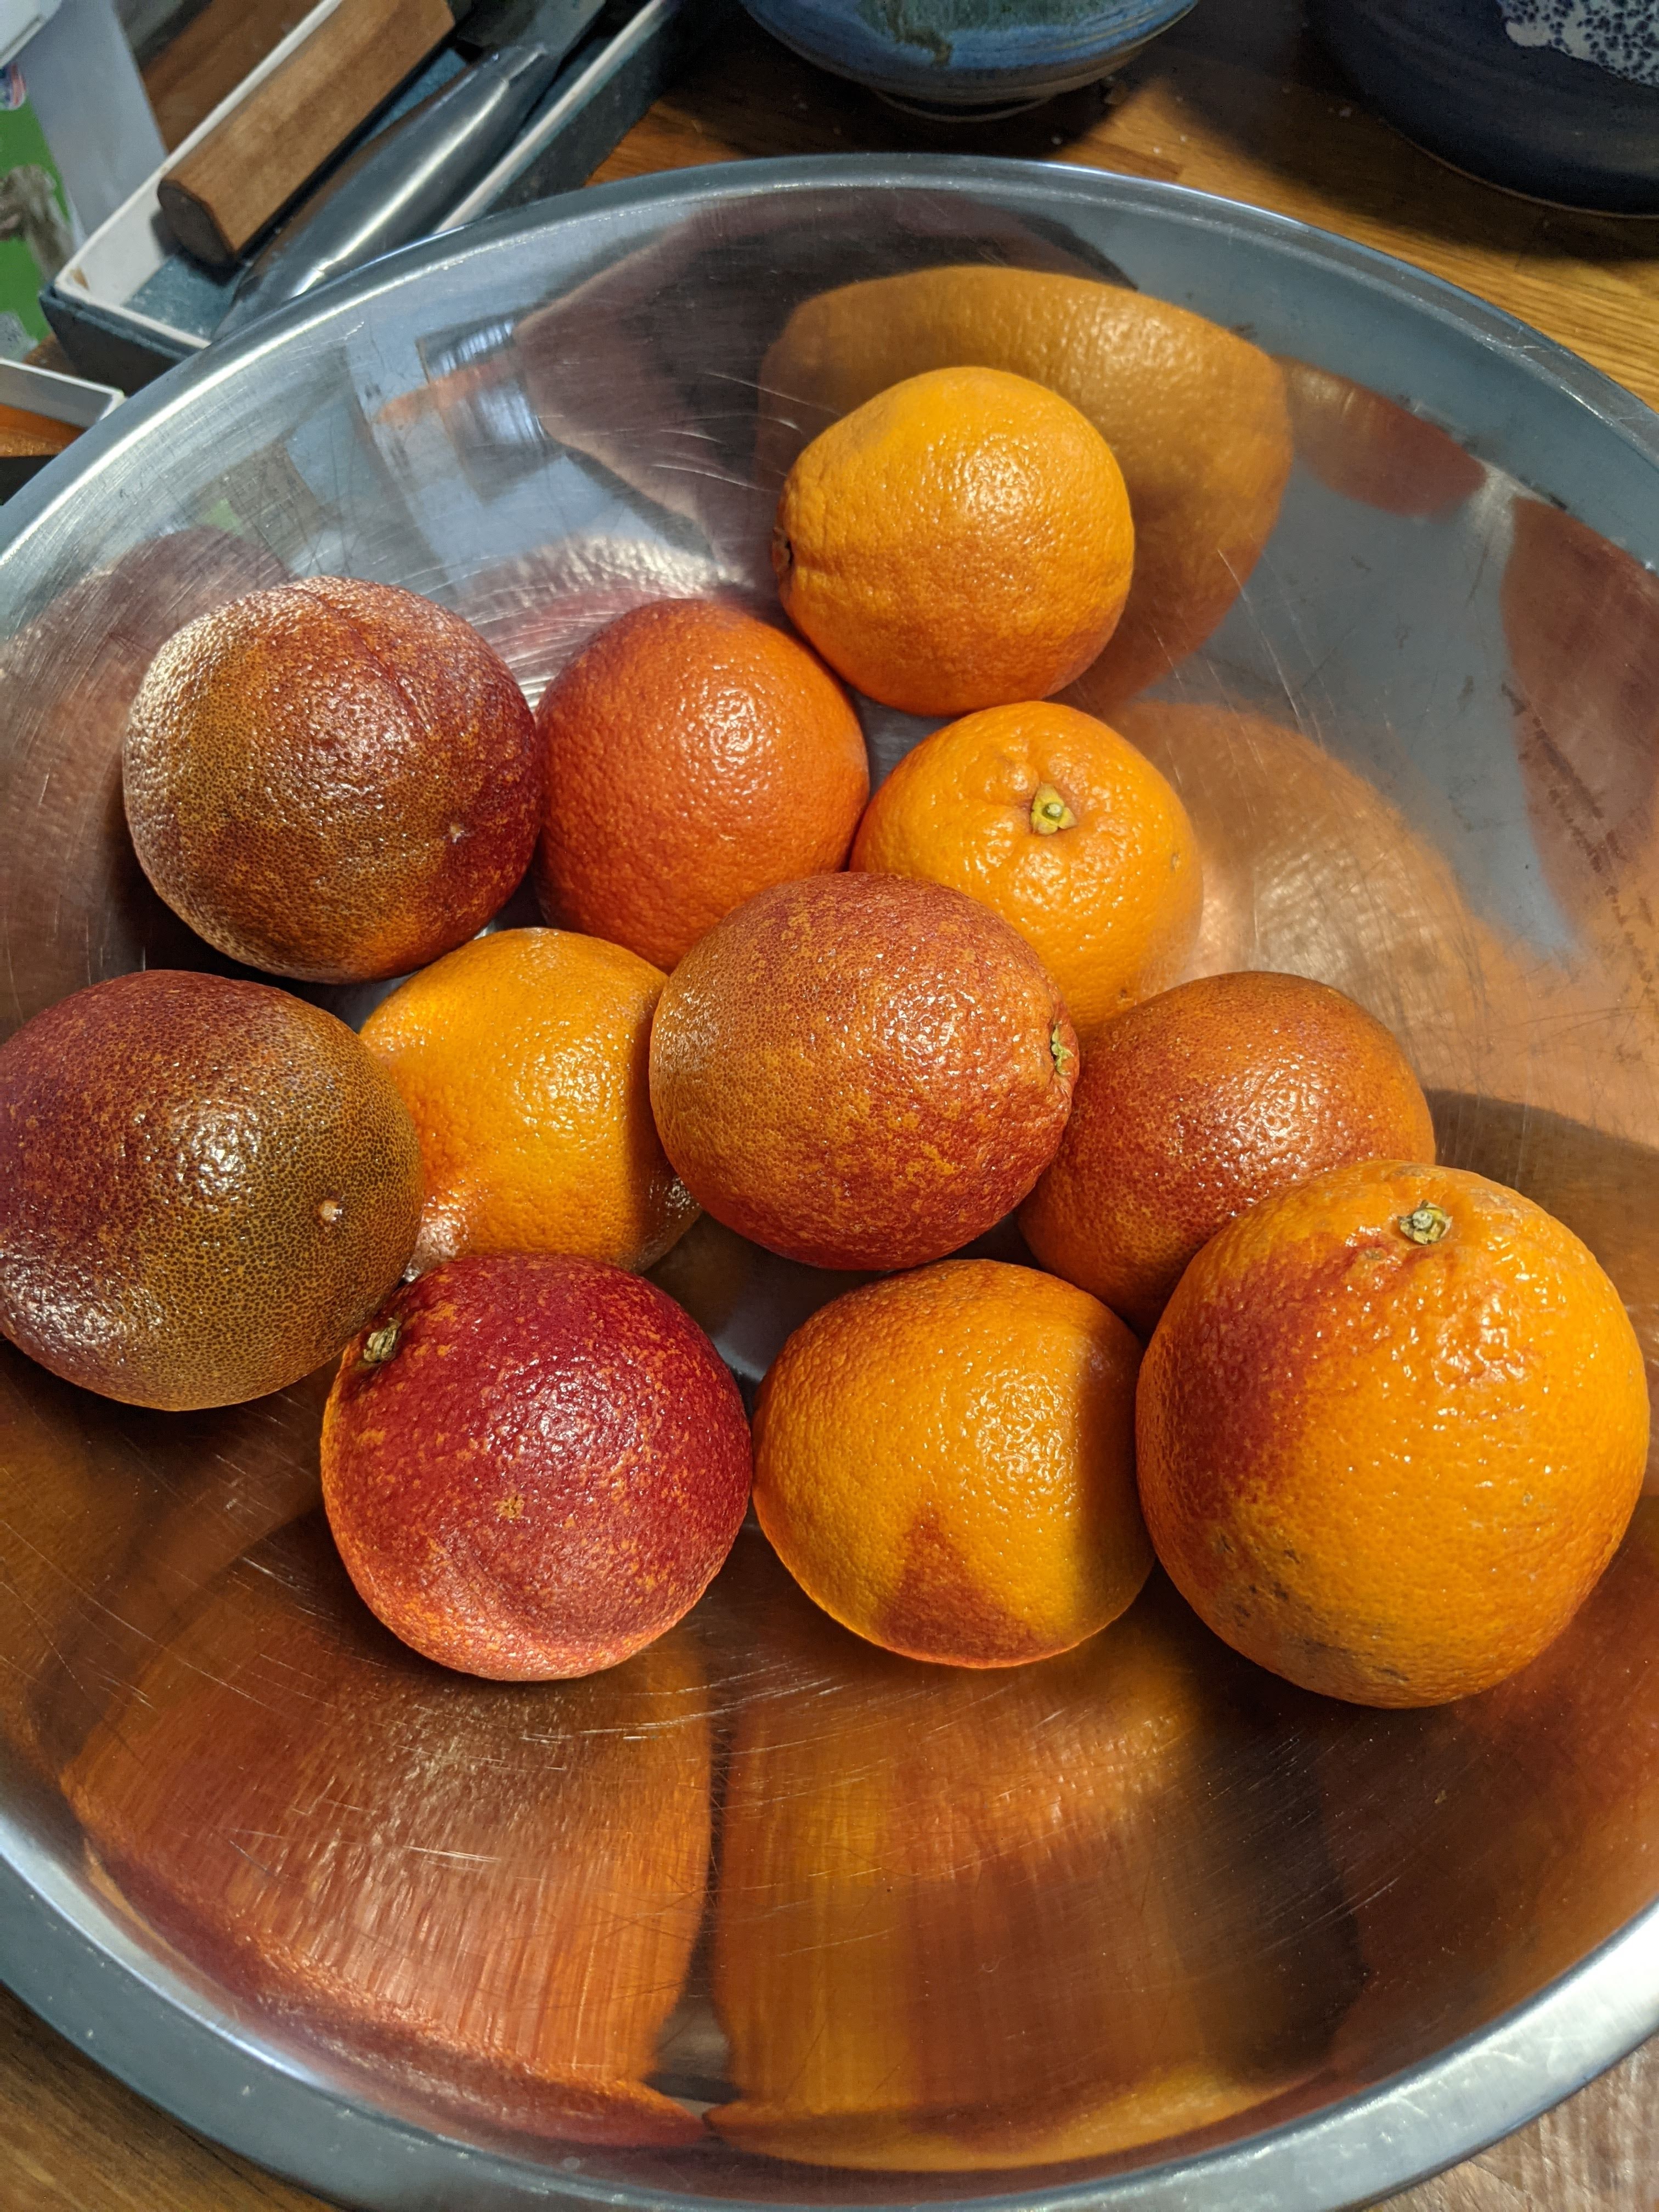
I discovered blood oranges in my thirties, at the same time that I discovered the bliss that is gelato, and I am still sad about all the years I didn’t know they existed. Something about the blush on the skins, and the shock of the deep purple flesh when you cut open a blood orange delights me. These are not the boring oranges that all of us who played youth soccer remember from half-time. The flavour is more complex; it’s sweeter, but never cloying. But, to be perfectly honest, I don’t enjoy eating oranges of any kind out of hand. Orange are a project; you have to peel them somehow, and there’s the strings and pith, and then you have to wash your hands, and possibly your shirt. I’m kind of lazy that way.
Despite my tendencies, however, this marmalade is worth the effort it takes to make and process it. Not only does it taste fabulous, but it just looks so beautiful in the jar, especially when the light hits it and shines through the red preserve. I thought that I had missed the blood oranges this year, since my brain tells me that January is the season for buying citrus. I always start thinking about making marmalade right after Christmas. Imagine my excitement when a routine trip to Costco to replenish my dwindling flour supplies resulted in a bag of my favourites coming home with me in April! I knew what I was making, and I knew I wanted to share.
This project fits exactly with my intentions for this blog — you don’t need to grow everything you preserve, and you don’t need to limit your shopping to the farmers’ market to be a maker of food. Growing food and farmers’ markets, are wonderful things, but I fully believe that the act of making itself has value, whatever the ingredients and materials you use. Making should not be precious. It should not be limited to those with the money and class privilege to access esoteric ingredients or expensive equipment. We are all creative; we can all make; we all deserve to enjoy the product, the process, and the internal rewards of making. Start where you are.
***Important note! I am not a recipe developer, nor am I in any way qualified to pronounce definitively on safe canning procedures. I will share what I have learned and what I do, but you should always check with canning authorities like Bernardin or the American National Center for Home Food Preservation if you have questions about how to do things safely. You should ALWAYS use a tested and vetted recipe when you preserve food. Botulism is not something to mess around with!***

When you make marmalade, you should start by washing your fruit in warm, soapy water. You are going to be using the peel, so you want to make sure any nasty residues are removed. Rinse well too, because no one wants soapy-tasting marmalade. After I washed my fruit, I removed the peel with a serrated vegetable peeler, which removes the zest (home to the flavourful essential oils) in nice, long strips, while leaving the bitter pith (the white, stringy stuff) behind. A serrated peeler is a great tool to pick up, by the way. Peelers are not expensive, and a serrated-edge one can also peel peaches, kiwis and even tomatoes. Mine is a Kuhn-Rikon, and I have had it for years. I then stacked the strips in piles, and sliced them as thinly as I could, into juliennes. You should use the sharpest knife you have for this step. (You should also listen to me, and not my mother, and ensure that you HAVE a sharp knife. It’s safer, and it works better.) This part takes a while. It’s kind of unavoidable. Personally, I get satisfaction from chopping and slicing, but I know some folks hate it. If you are in the latter group, marmalade may not be the project for you, and there is nothing wrong with that. I promise to share jam, and other preserves, that don’t involve this kind of tedious work.

After dealing with the peel, it was time to get at the fruit itself, and the beautiful purple juice. That means facing down the pith, which you definitely don’t want in your marmalade. I sliced off the ends of the oranges, so I could see the flesh, and the fruit would sit flat on my cutting board. I then carefully cut down the sides, removing the pith from the flesh, and doing my best to retain as much of the fruit as possible. You will also see, from the pictures, that you can see the thin lines of membrane that separate each segment of the orange. Those lines are important for the next step, which goes by the “fancy” French name of “supremeing” your fruit.
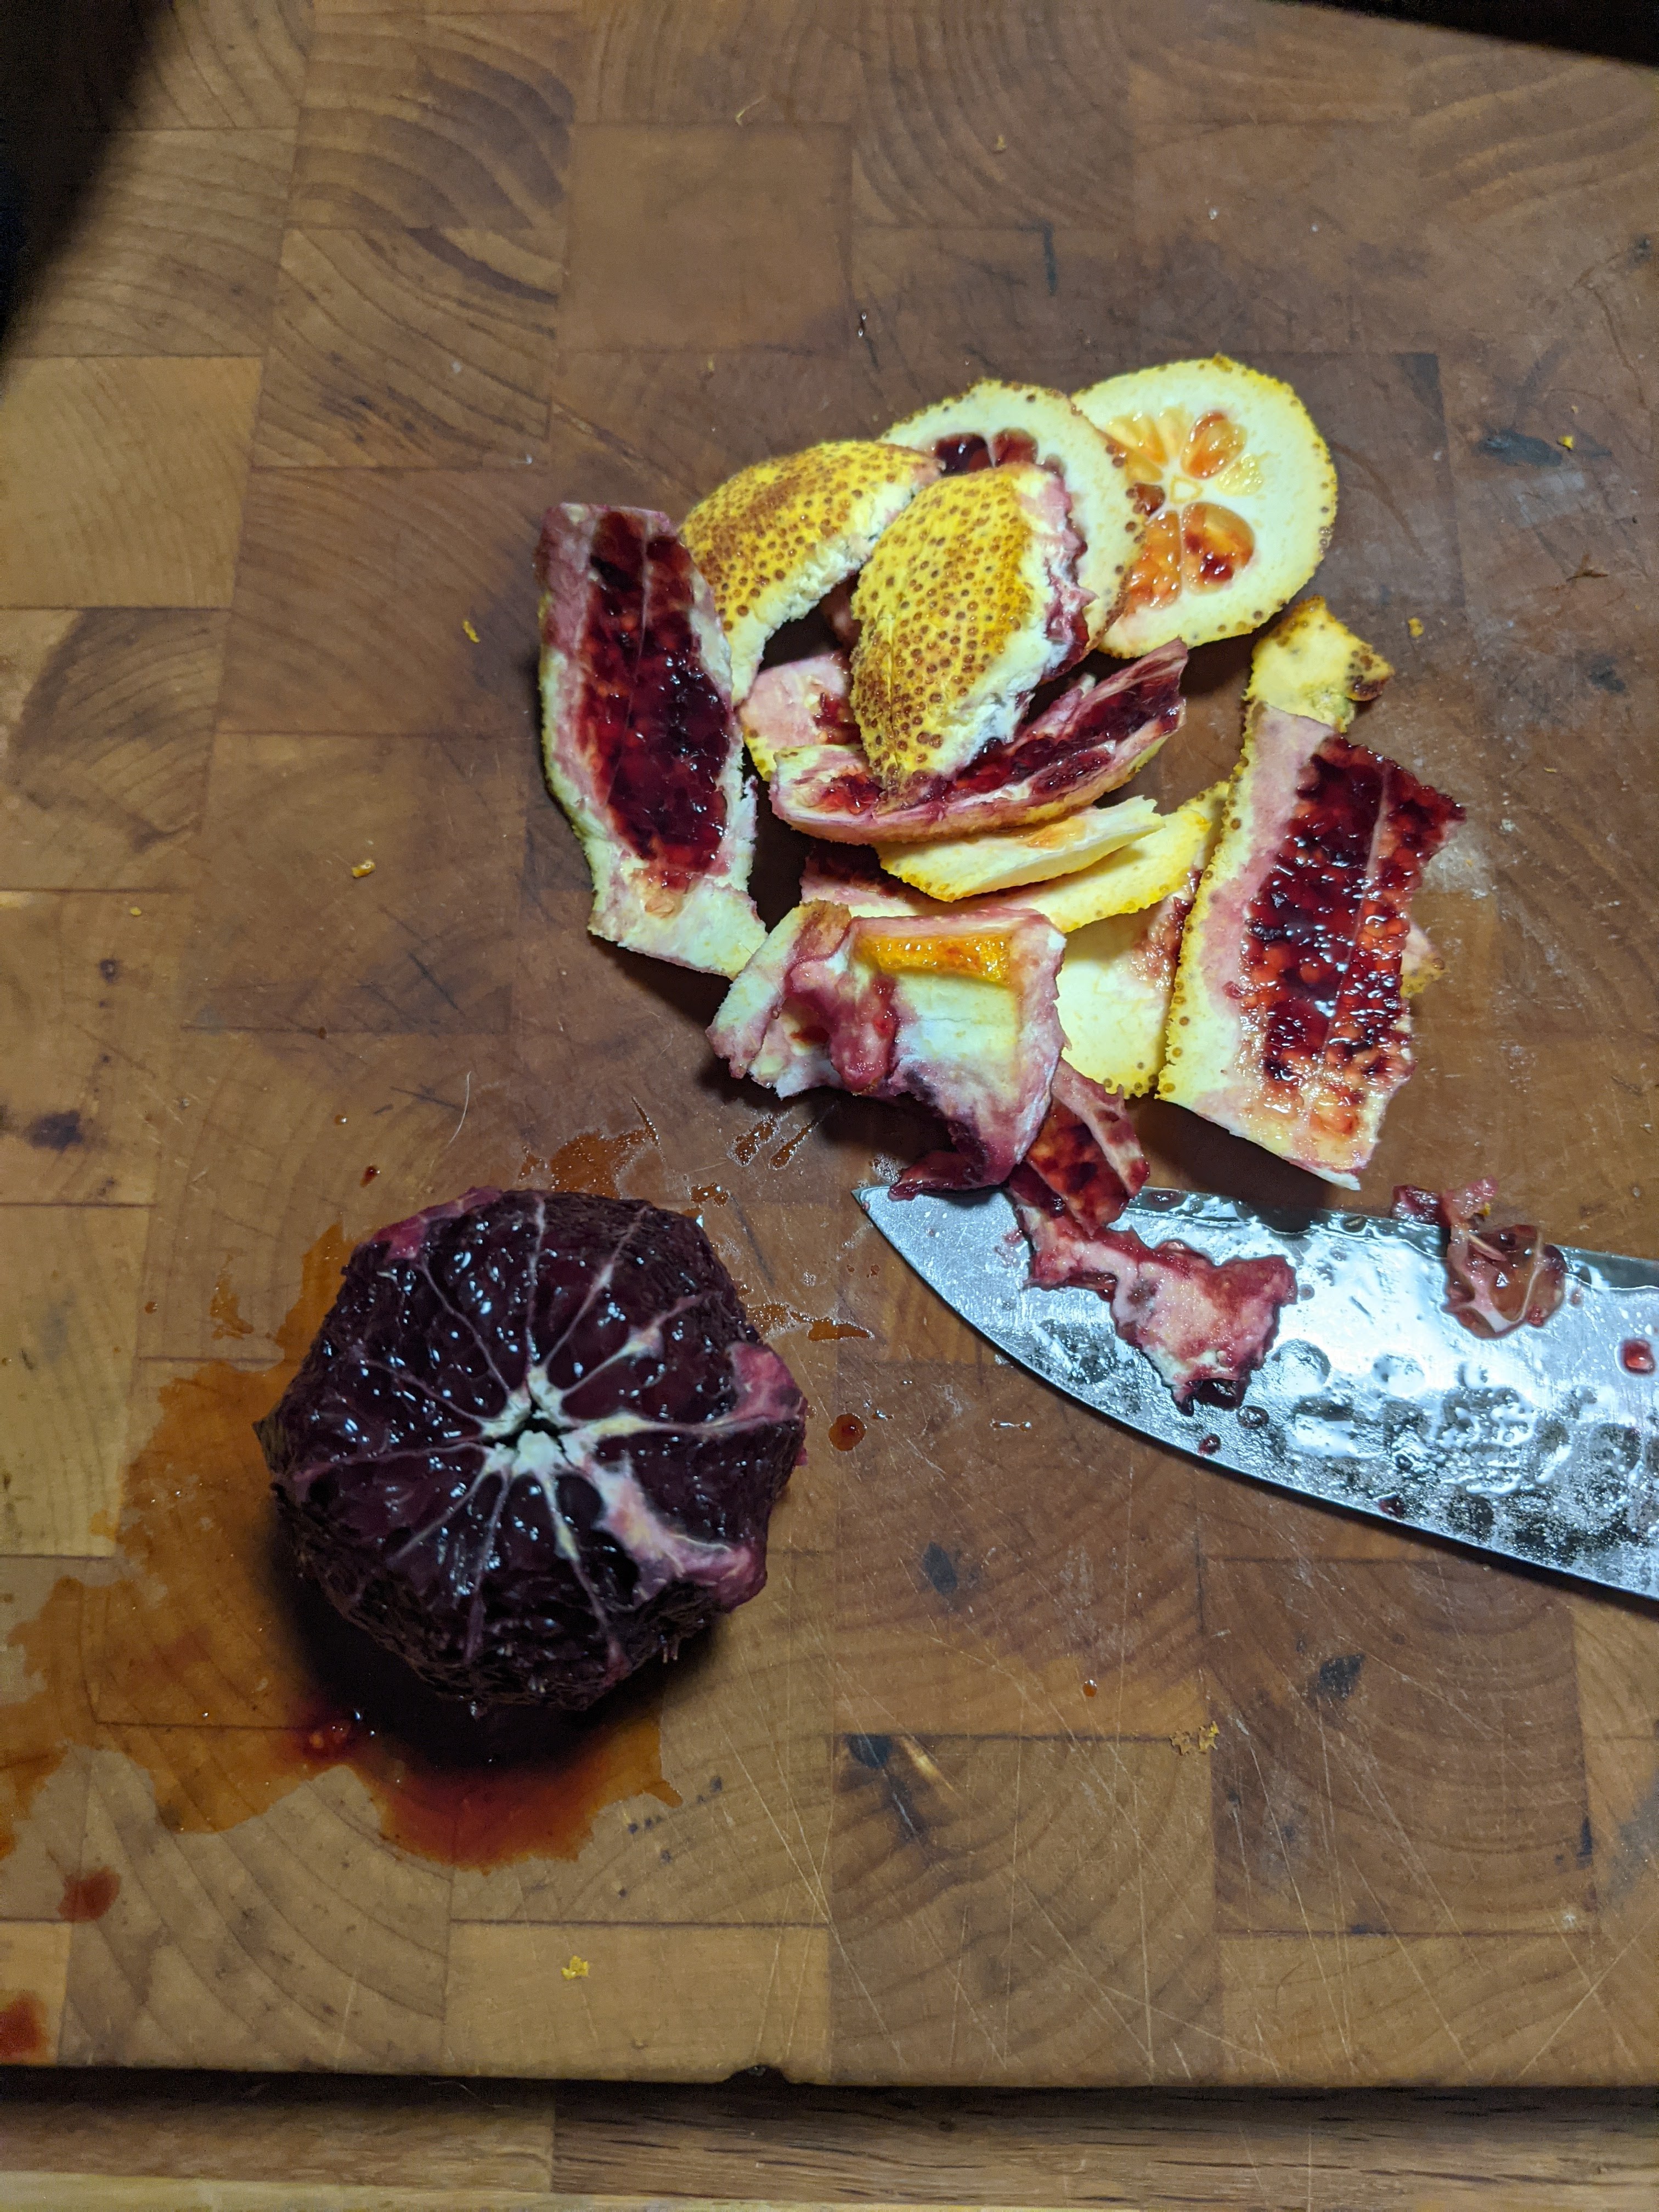
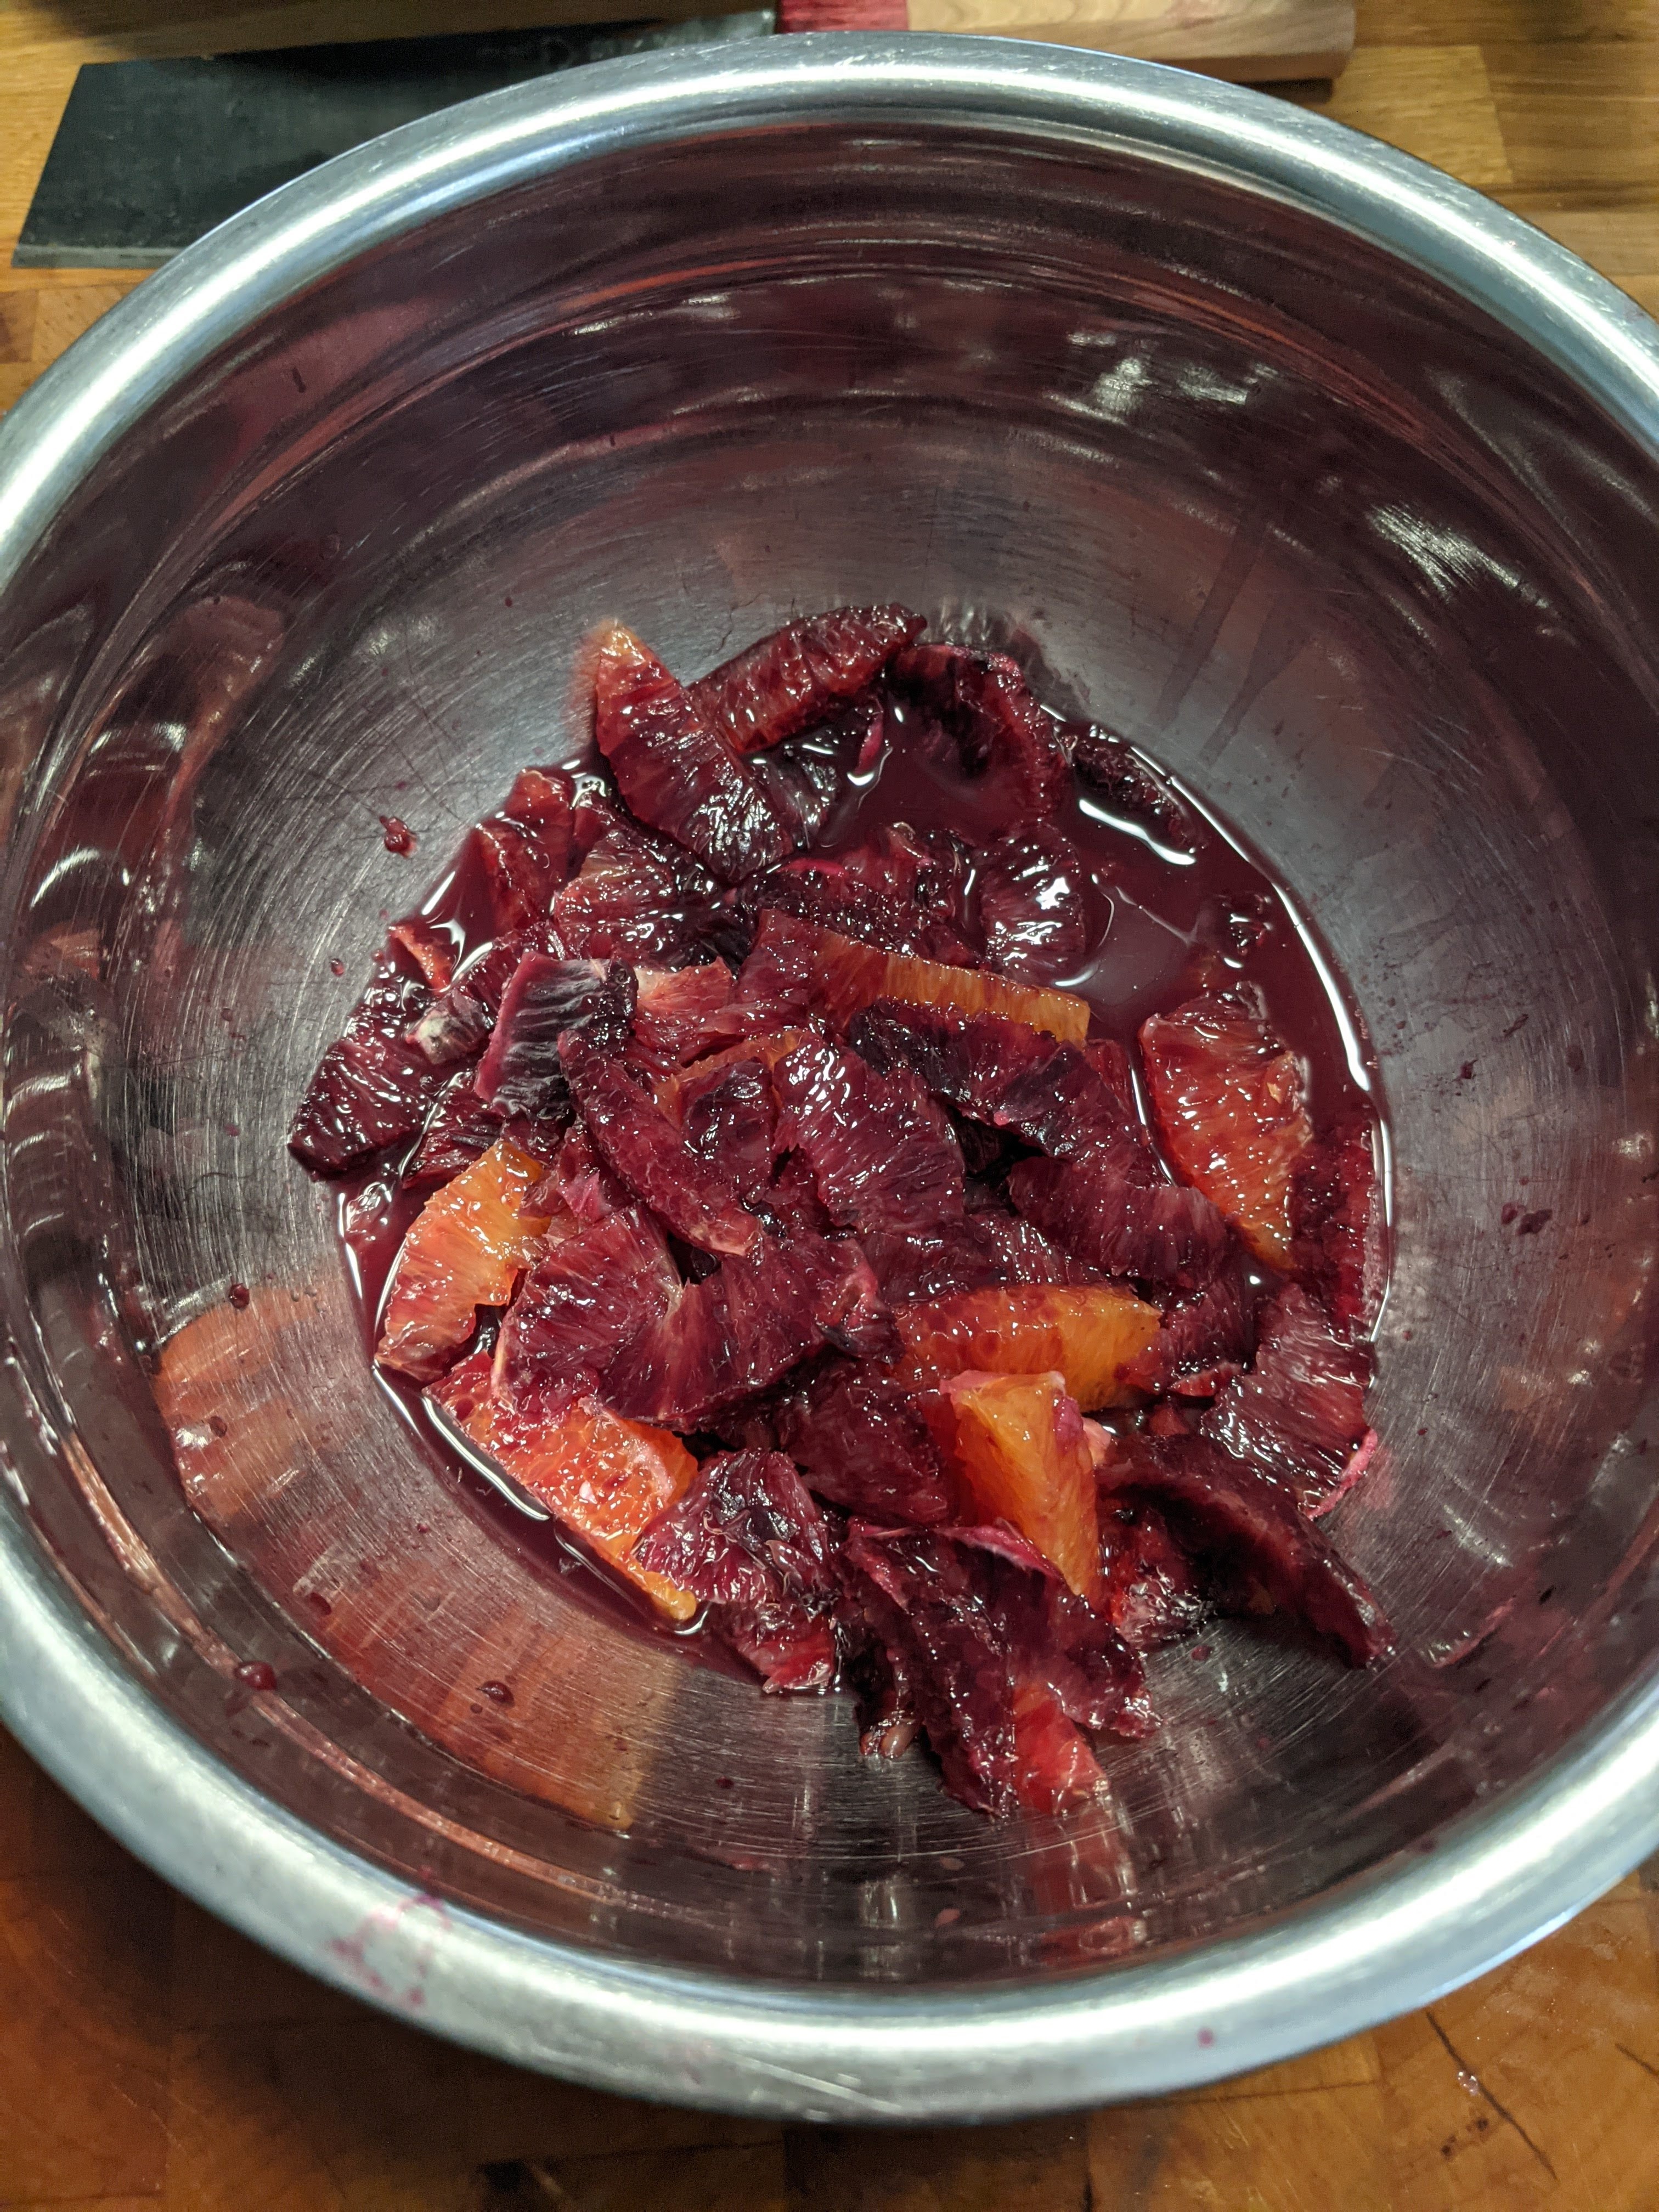
To supreme a citrus, you hold the fruit in your non-dominant hand, and carefully cut along the membrane lines. It can help to angle your knife slightly when you make the cut against the second membrane — the cut that is going to free that segment from the fruit in your hand. This is a very messy, very juicy process, and you want to save as much of that juice as you possibly can! So I always supreme my citrus over a wide bowl. The fruit segment and the juice fall from your hand into the bowl. Confession time: I did have to retrieve more than a few pieces of membrane and errant pith that made their way into my bowl of fruit and juice, despite my best efforts. I would love to have filmed this process for you, as it can be difficult to picture if you have never done it, but sadly, I have only two hands and I haven’t yet succeeded in teaching my St. Bernard to use my camera! Martha Stewart (of course!) has a great guide to this, here. I must warn you, the volume of fruit from this process seems sadly meagre for the amount of effort expended! My picture below is of all the segments from three and a half pounds of blood oranges. I promise, if you use the amount of oranges called for in the recipe, the fruit will be enough! The bulk of your marmalade is going to be that lovely pile of zest that you have julienned!
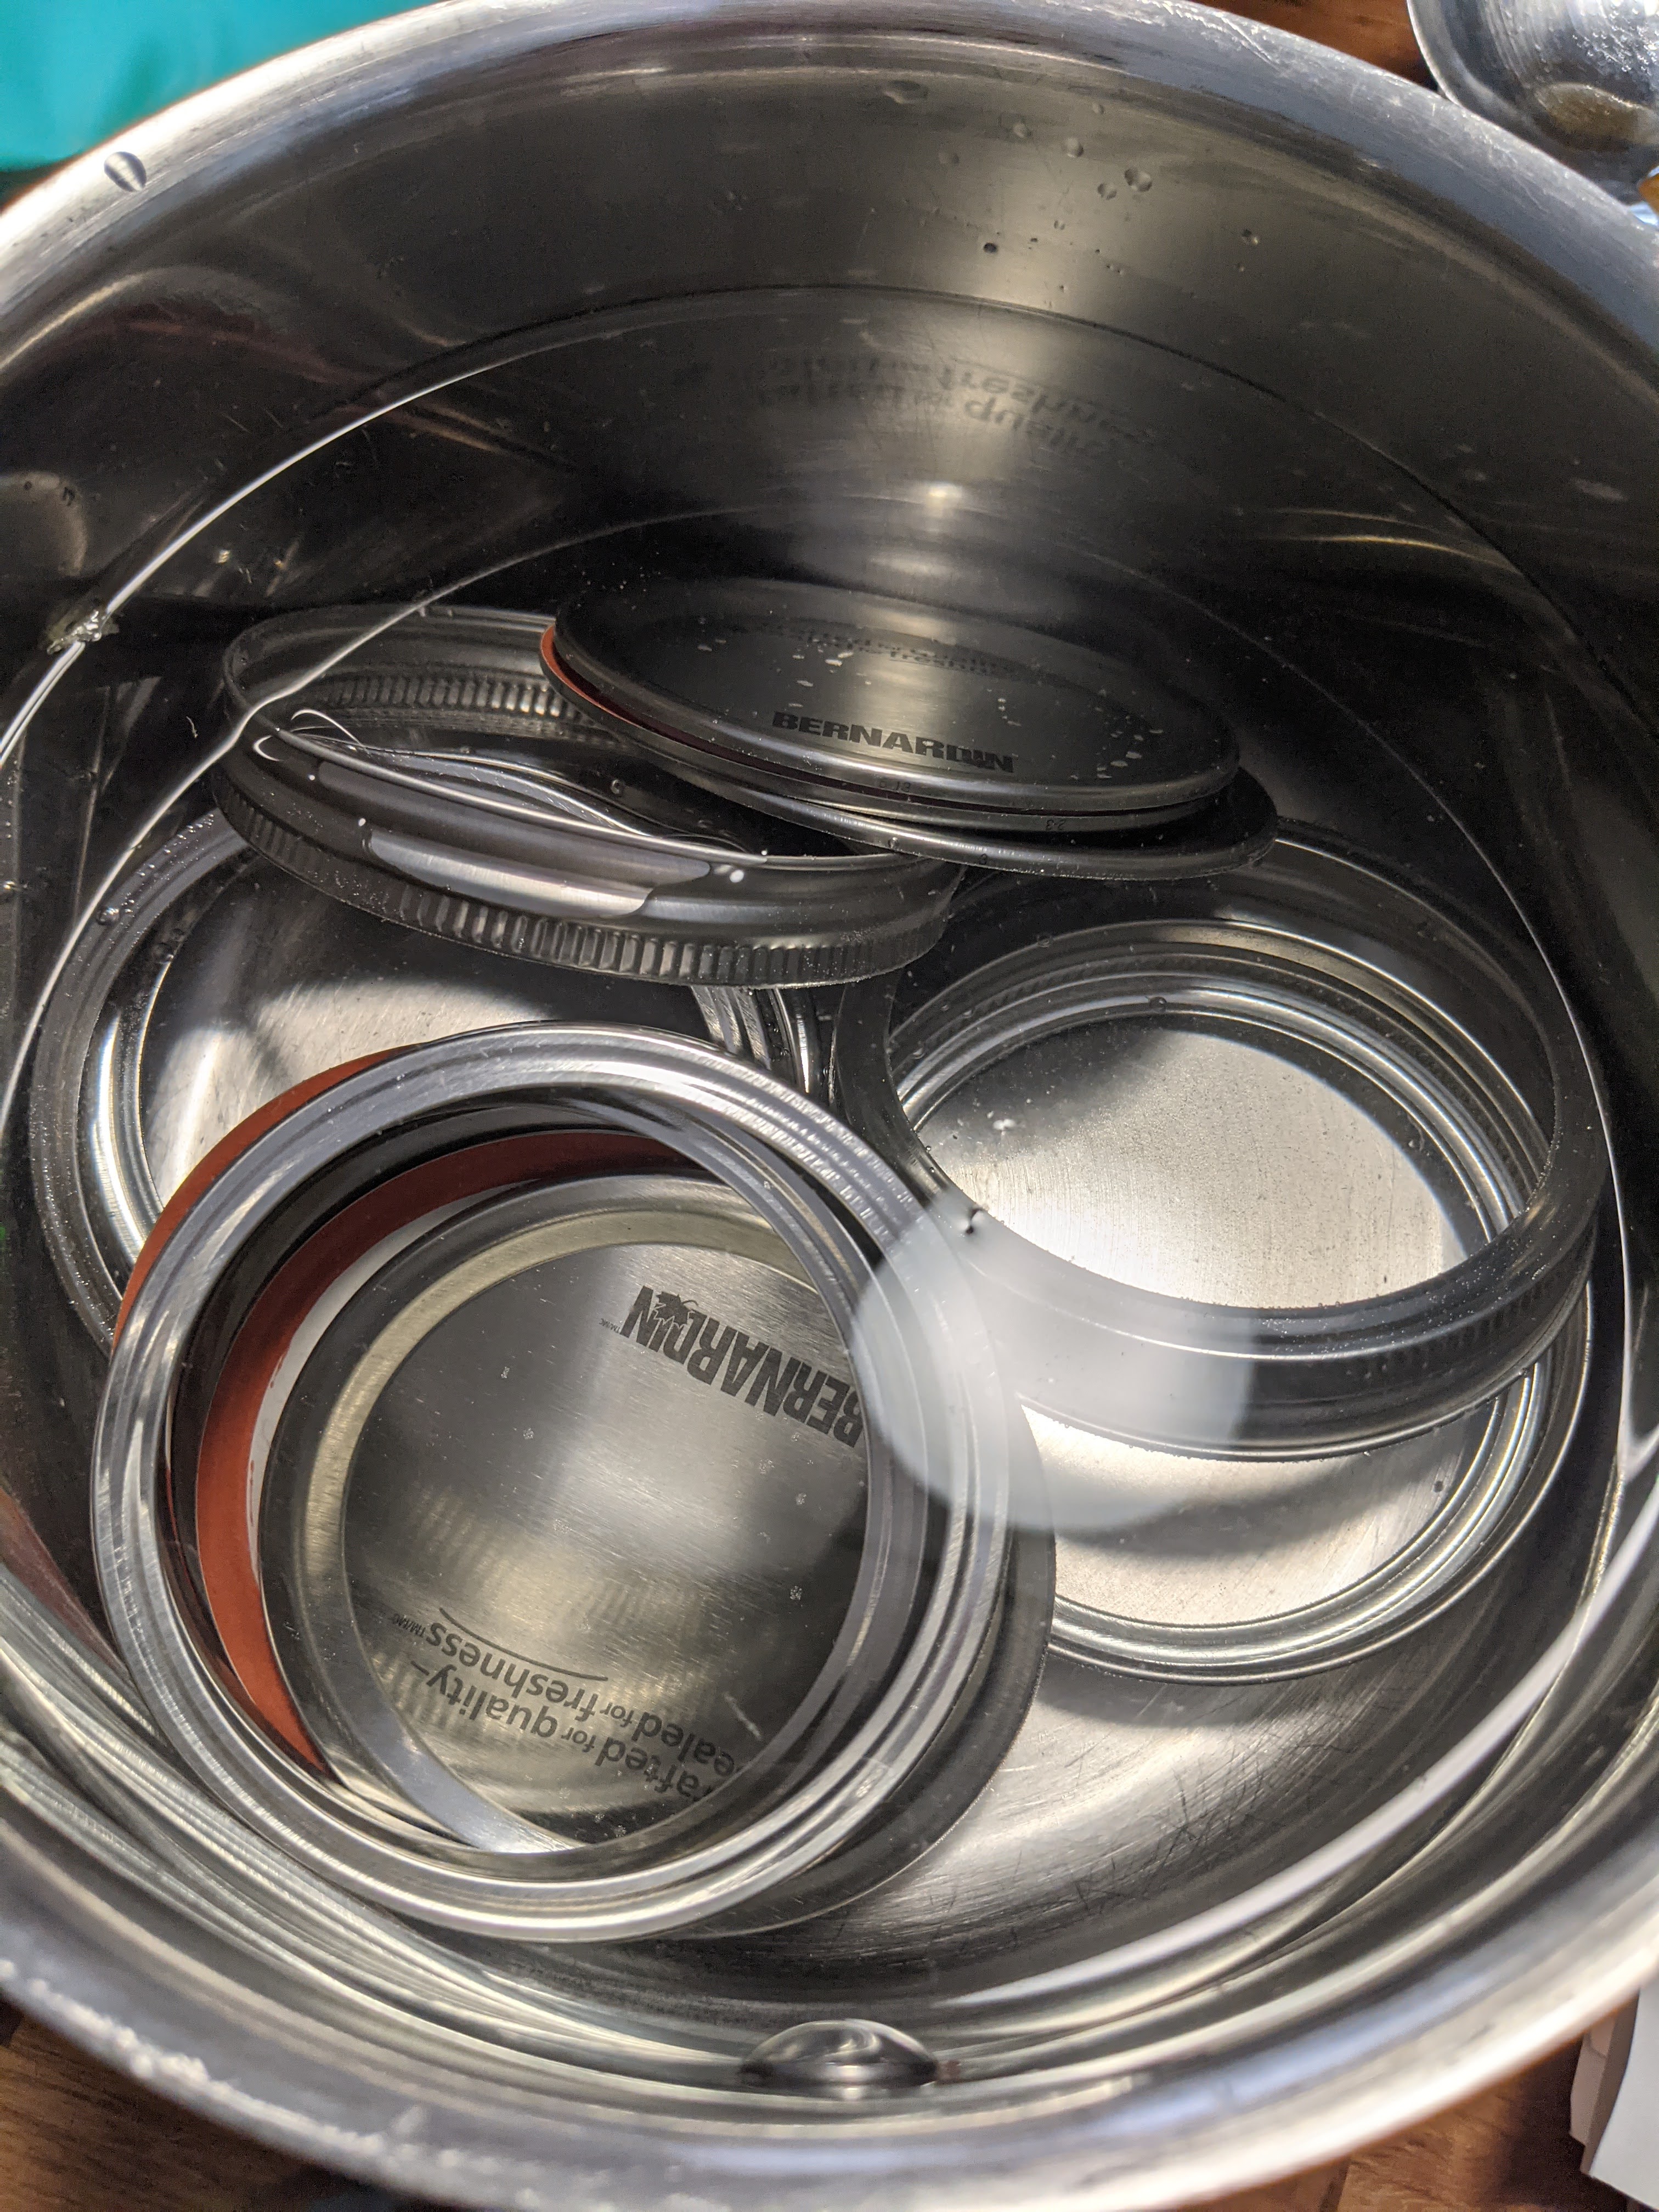
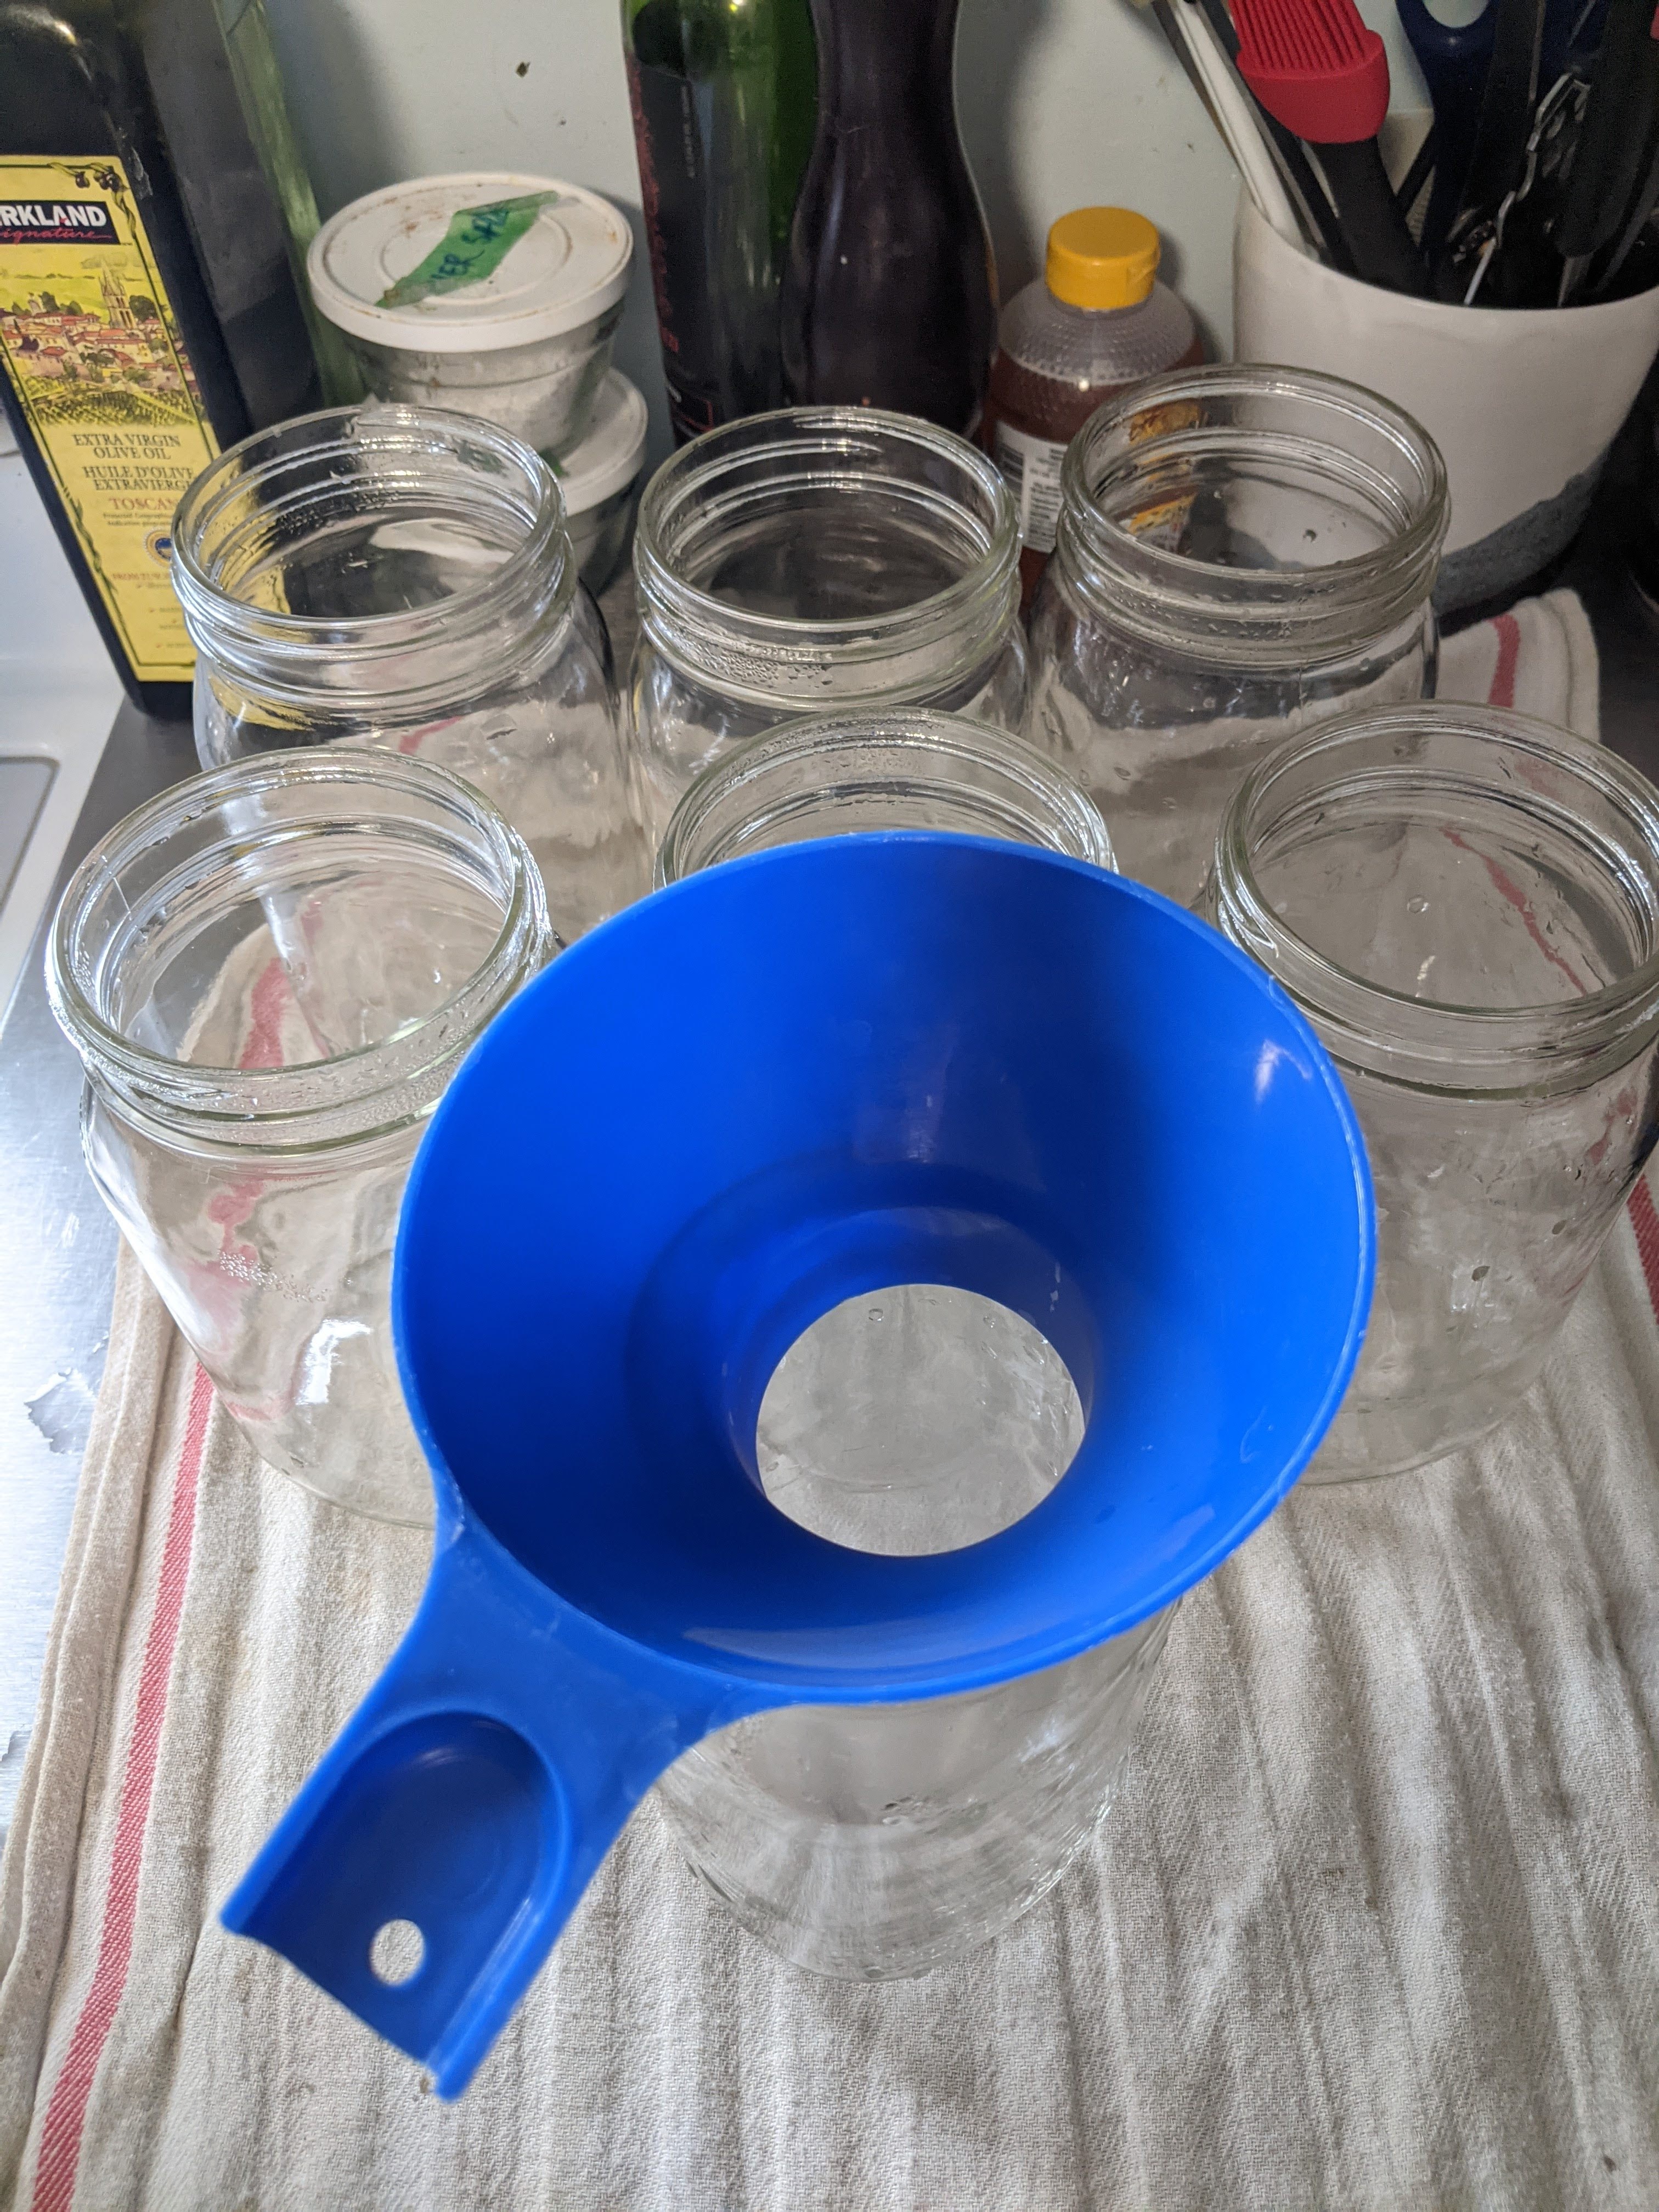
Once my fruit was prepped, I set up my water-bath and my jars for canning. It’s good to do this before making your preserves, because you want to put hot marmalade into hot jars, and it takes ten minutes from when the water in your canning pot comes to the boil for your jars to be properly sanitized. This marmalade is only processed for ten minutes, so it’s vital that you sterilize the jars! First, make sure that you have the jars, lids, and rings that you need. Marisa’s recipe indicates a yield of three 500 ml (pint) jars, but I find we don’t get through a whole pint of marmalade before it starts to spoil in the fridge. So, I chose to process in 250 ml jars. I washed seven jars, not six, because when it comes to preserving, yields can vary, and it’s much better to have an extra jar ready than to need one more than you have! (Yields vary because fruit doesn’t come in standard sizes, nor is the amount of juice consistent.) I also washed my canning rings, and seven NEW lids. You CANNOT reuse canning lids; they will only provide a safe seal once! Rings are reusable, as long as they have not rusted or broken; jars should be checked carefully for chips and cracks before reuse.
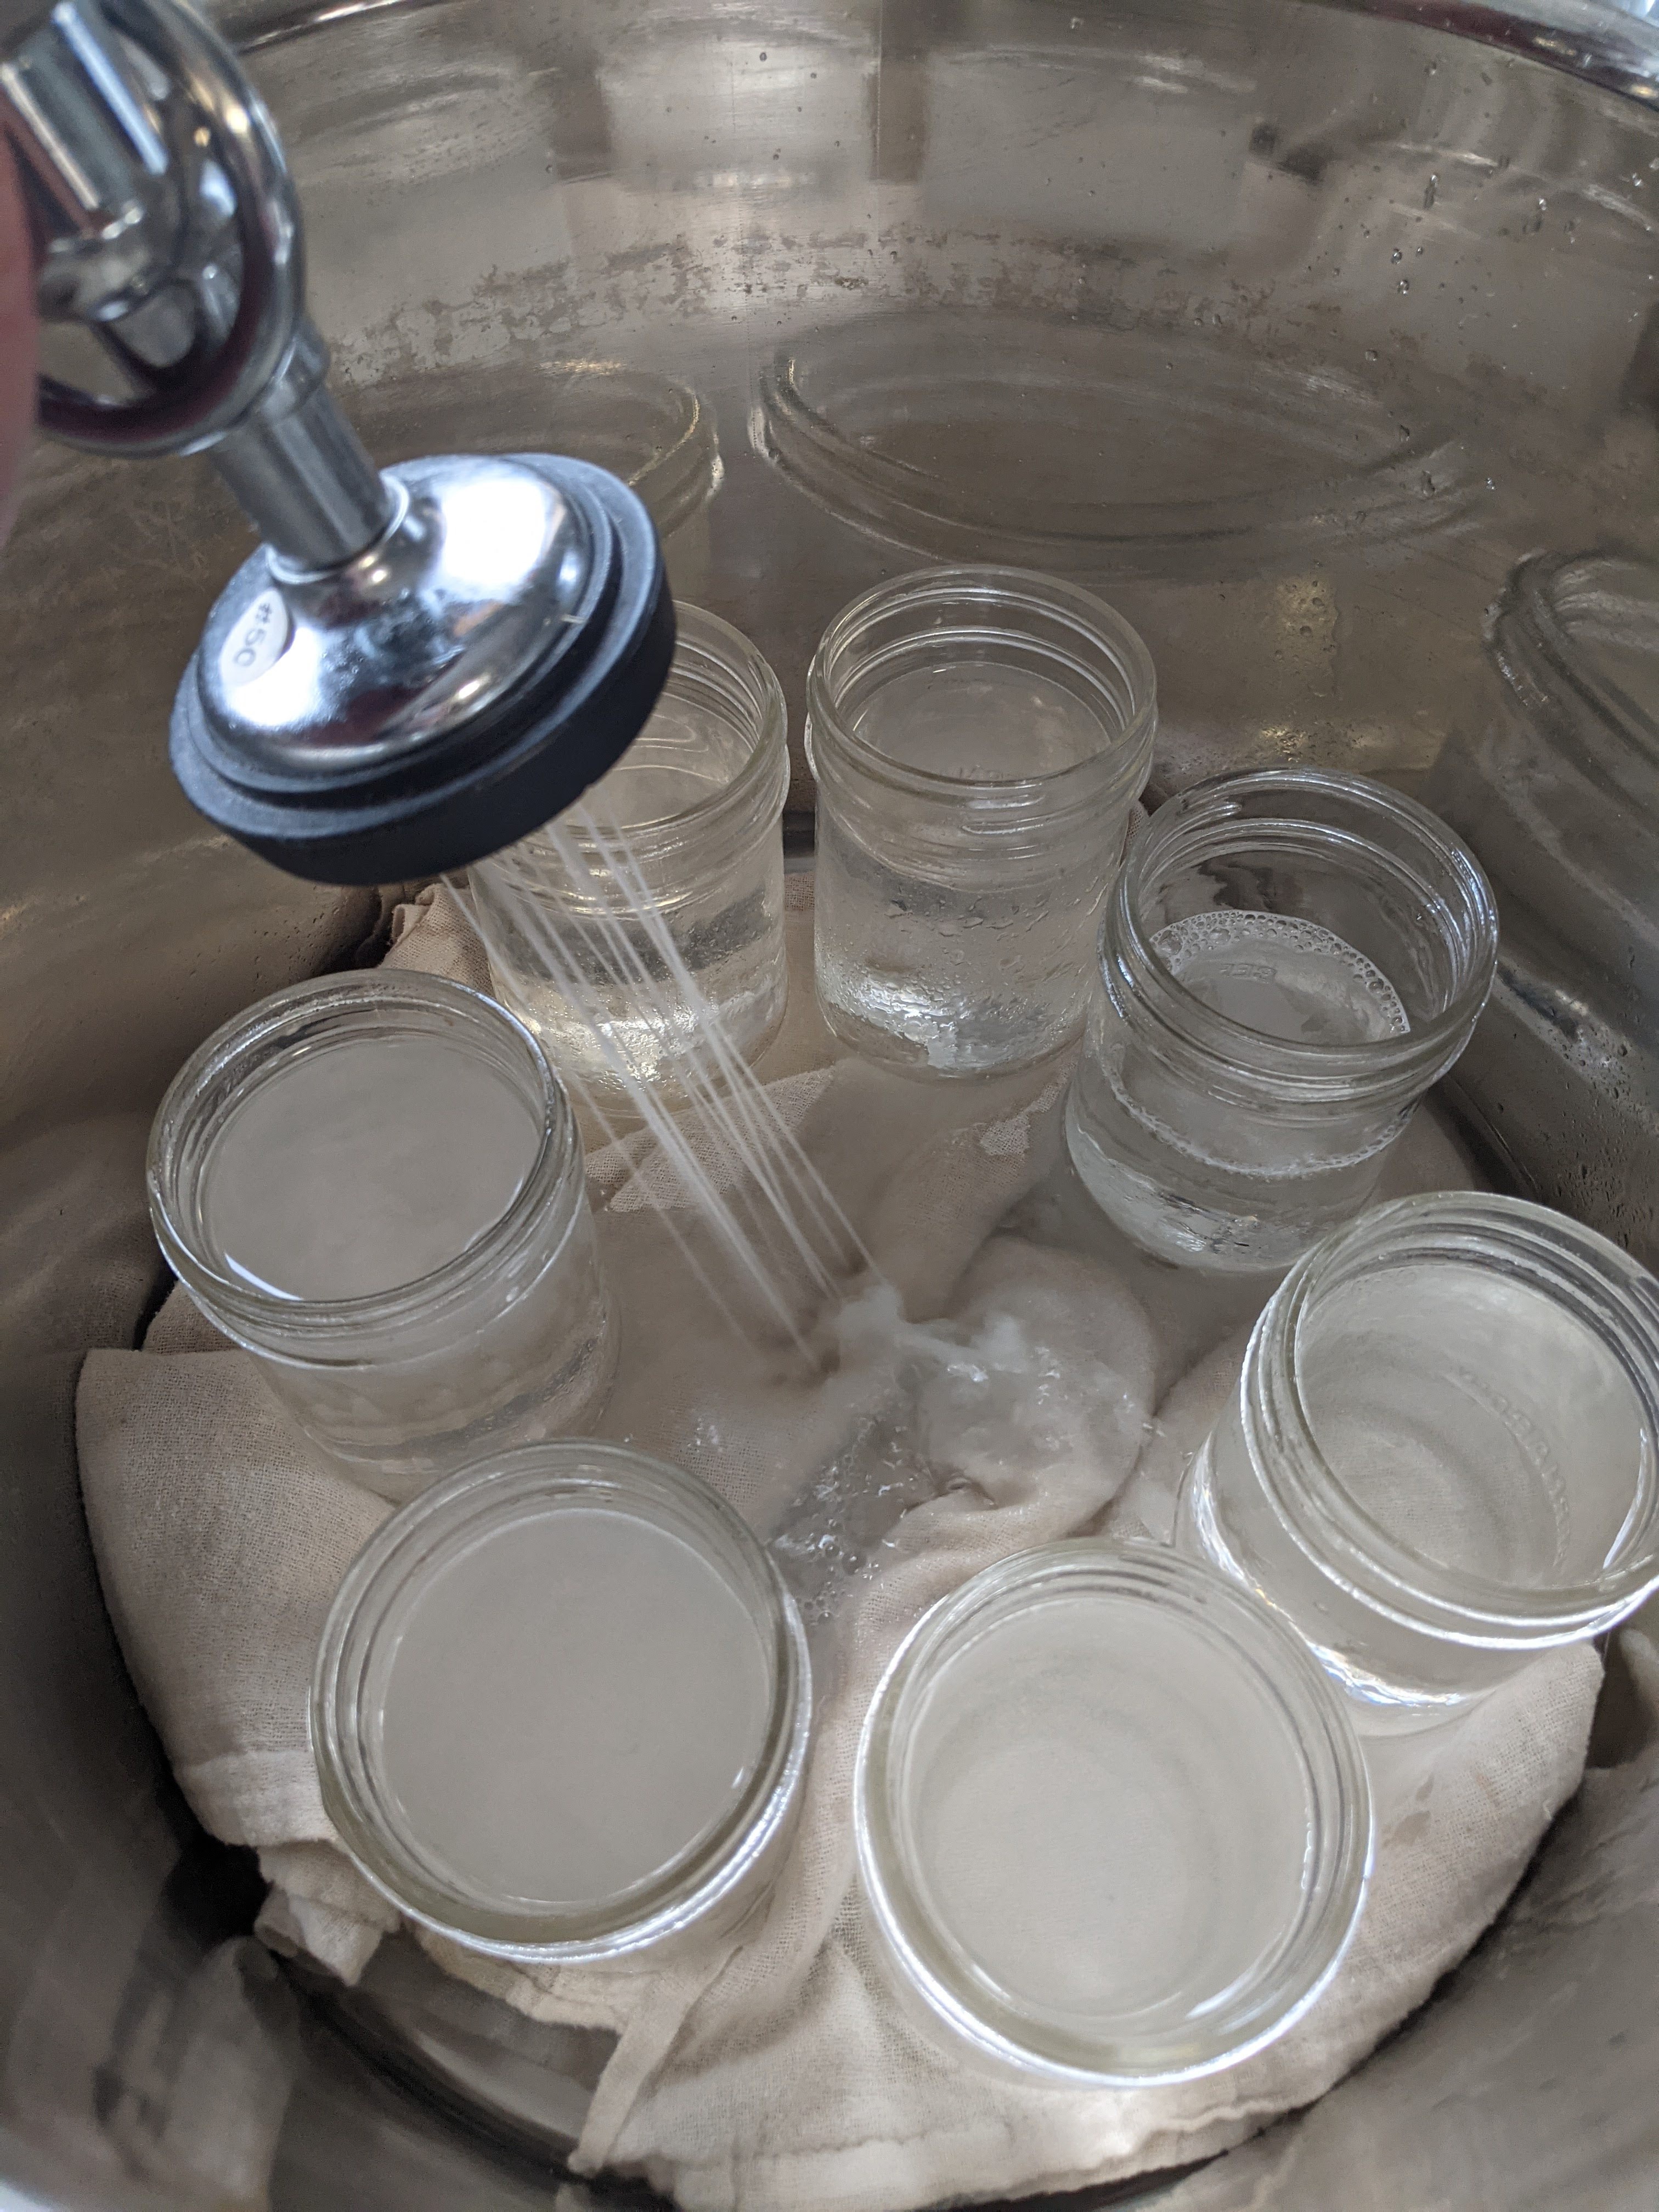
The clean jars then go into a big, deep pot. I use my stock pot for canning 250 ml jars. It’s roomy, and deep enough, and it was really cheap! I do not see the point in buying a pot just for water-bath canning, if you have something that will work already. And I do not believe in single-use tools in the kitchen! This pot has been through years of stock-making and canning, and it still looks new. I believe I bought it for about twenty dollars at Real Canadian Superstore (Loblaws) about fifteen years ago. I saw similar pots in Walmart this week, for about thirty dollars. It’s always wise to check thrift stores and Facebook Marketplace (if you use it) for items like these. The point is, you don’t need anything fancy. You might notice that there is a towel on the bottom of the pot, under the jars. You don’t want to put the jars directly on the bottom of the pot, to mitigate the heat and to ensure that the jars don’t crack. Dedicated canning pots will often come with a rack, but I don’t like them. Often, they prevent you from canning larger jars because the pot isn’t deep enough with the rack in. If you have a cooling rack that will fit in your pot, or a silicone trivet, those can also work. I use towels because I have a lot of them! The next step (shown in the photo) is to fill the pot with enough water that the jars are covered by a couple inches. This is not exact, and estimating is fine. Make sure you get some water in the jars while filling, or they will start to float. Meanwhile, pop your rings and lids in a small saucepan, and cover them with a bit of water. Turn the heat on high under your canning pot, and on low under the small saucepan. You want to boil the jars for 10 minutes, but you just want to soften the sealing compound on the lids.
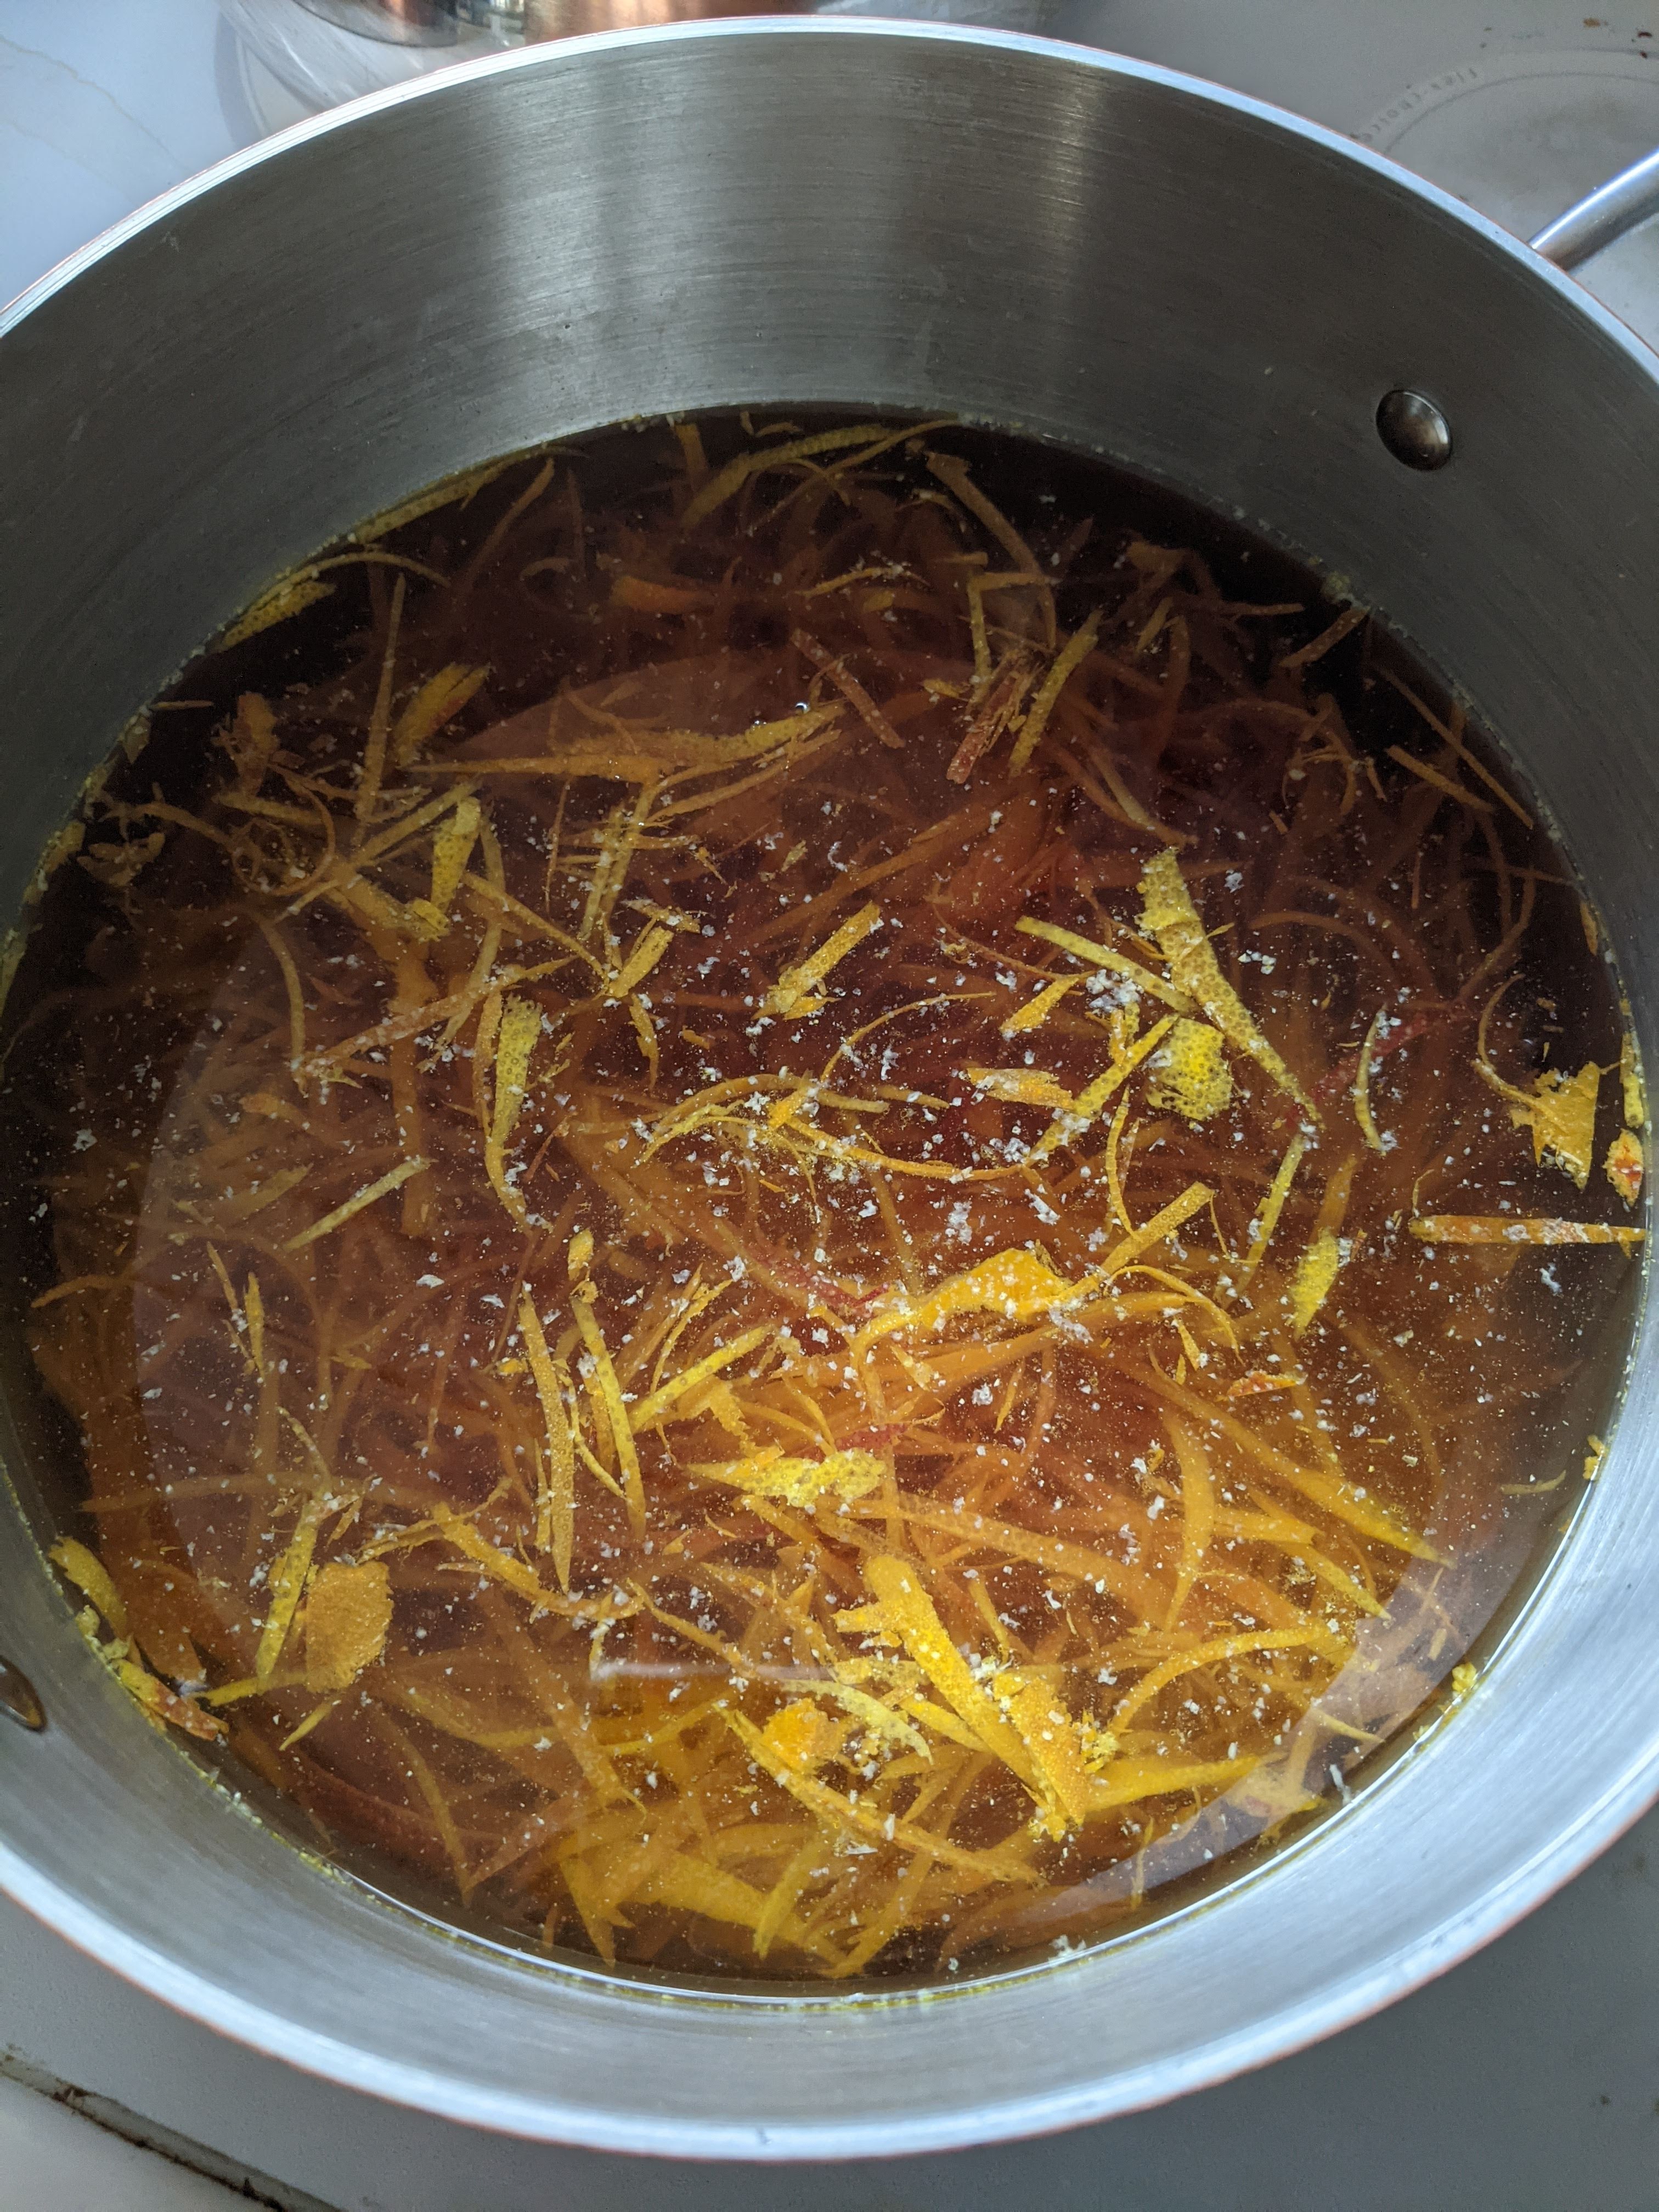
Finally, on to the marmalade! I took my lovely pile of zest and combined it in a saucepan with two litres (quarts) of water, and brought that to a boil. The zest simmered for twenty-five minutes before I drained it, reserving the cooking liquid. If you are not confident that you have sliced the zest really finely, you can simmer it for a further five minutes.
I then combined my now-tender zest with the fruit segments, the juice, 1.2 kilograms of sugar, two teaspoons of powdered pectin (I use Certo), and 1.4 litres of the reserved liquid from cooking the zest, all in my biggest saucepan. A note about the sugar — I know that sounds like an awful lot of sugar. I’ve seen the canning blog comment sections asking if, and by how much, the sugar in a recipe can be reduced. The thing is, sugar plays an important role in the gelling process of jams, jellies and marmalades. If you reduce the sugar, you may not get the “set” from your hard work that you were looking for. You may end up with something that looks more like a sauce than a jam/jelly/marmalade. My own thoughts are that these products are intended to be condiments or toppings. We really shouldn’t be eating huge amounts of them at one sitting. And with jams and such, it’s very easy to keep track of how much we are eating. I worry far more about the sugar hidden in so many processed foods, where you wouldn’t expect it, and where it’s easy to consume a whole lot of sugar without ever realizing.
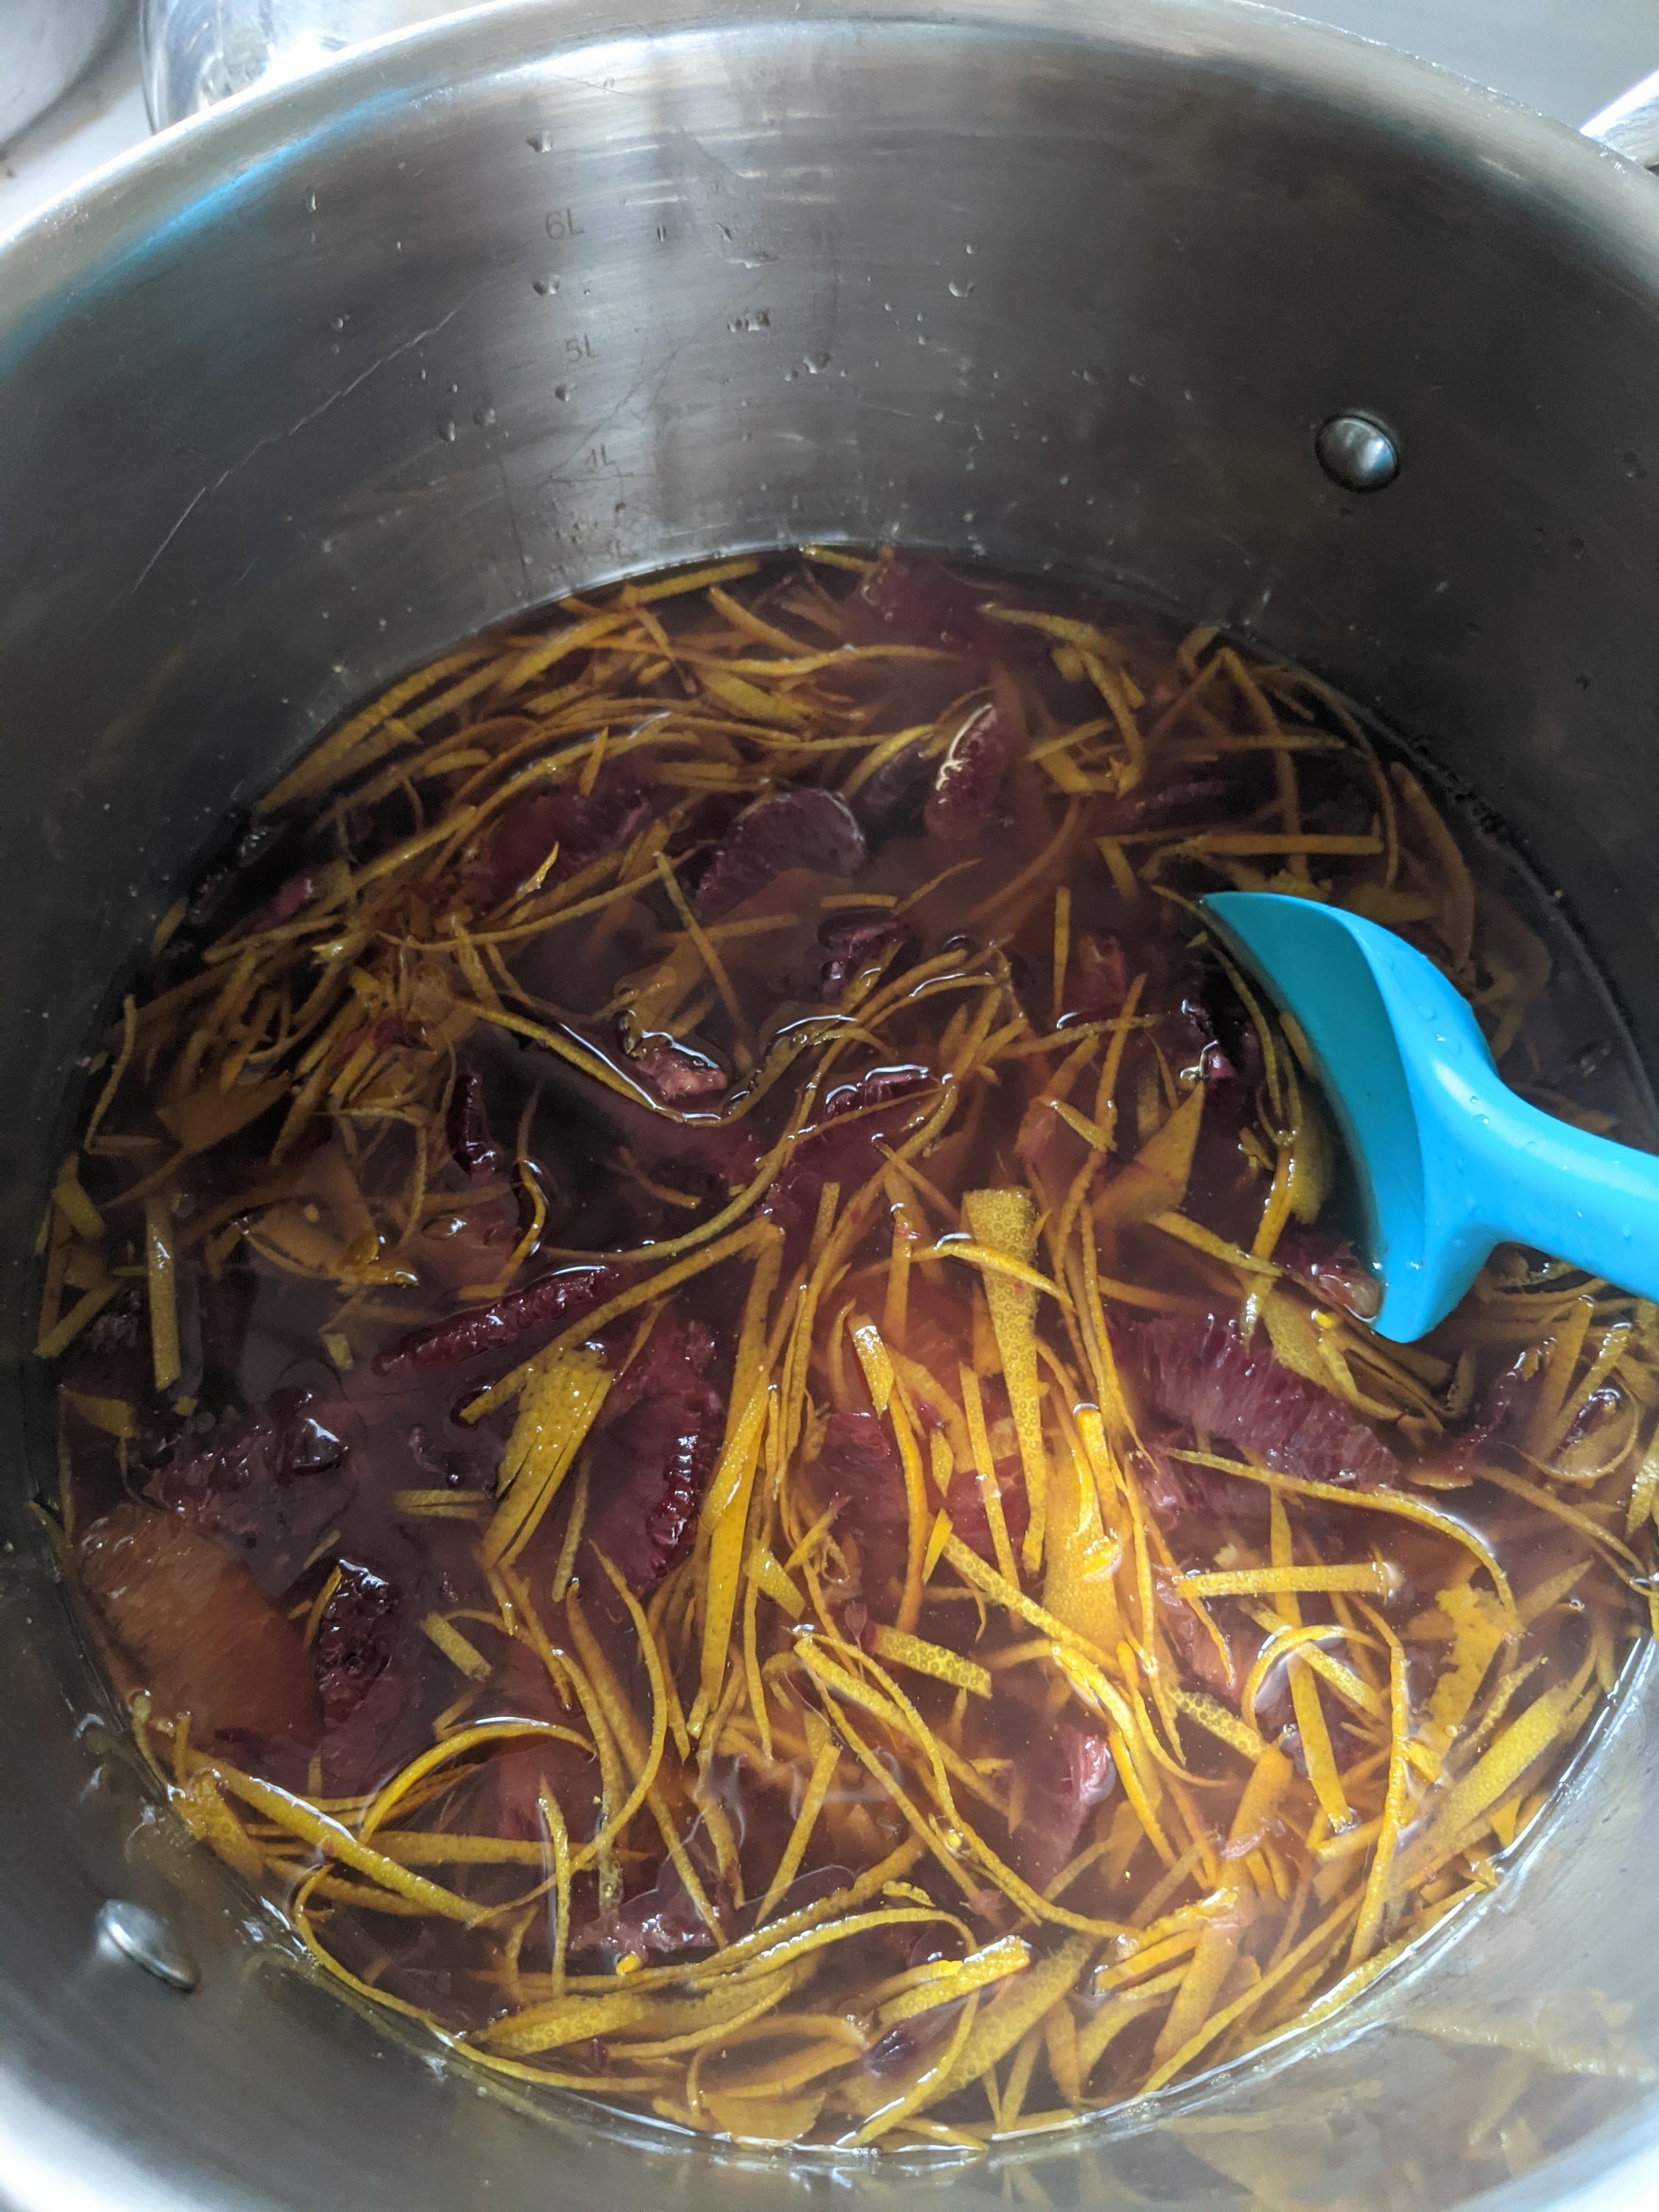
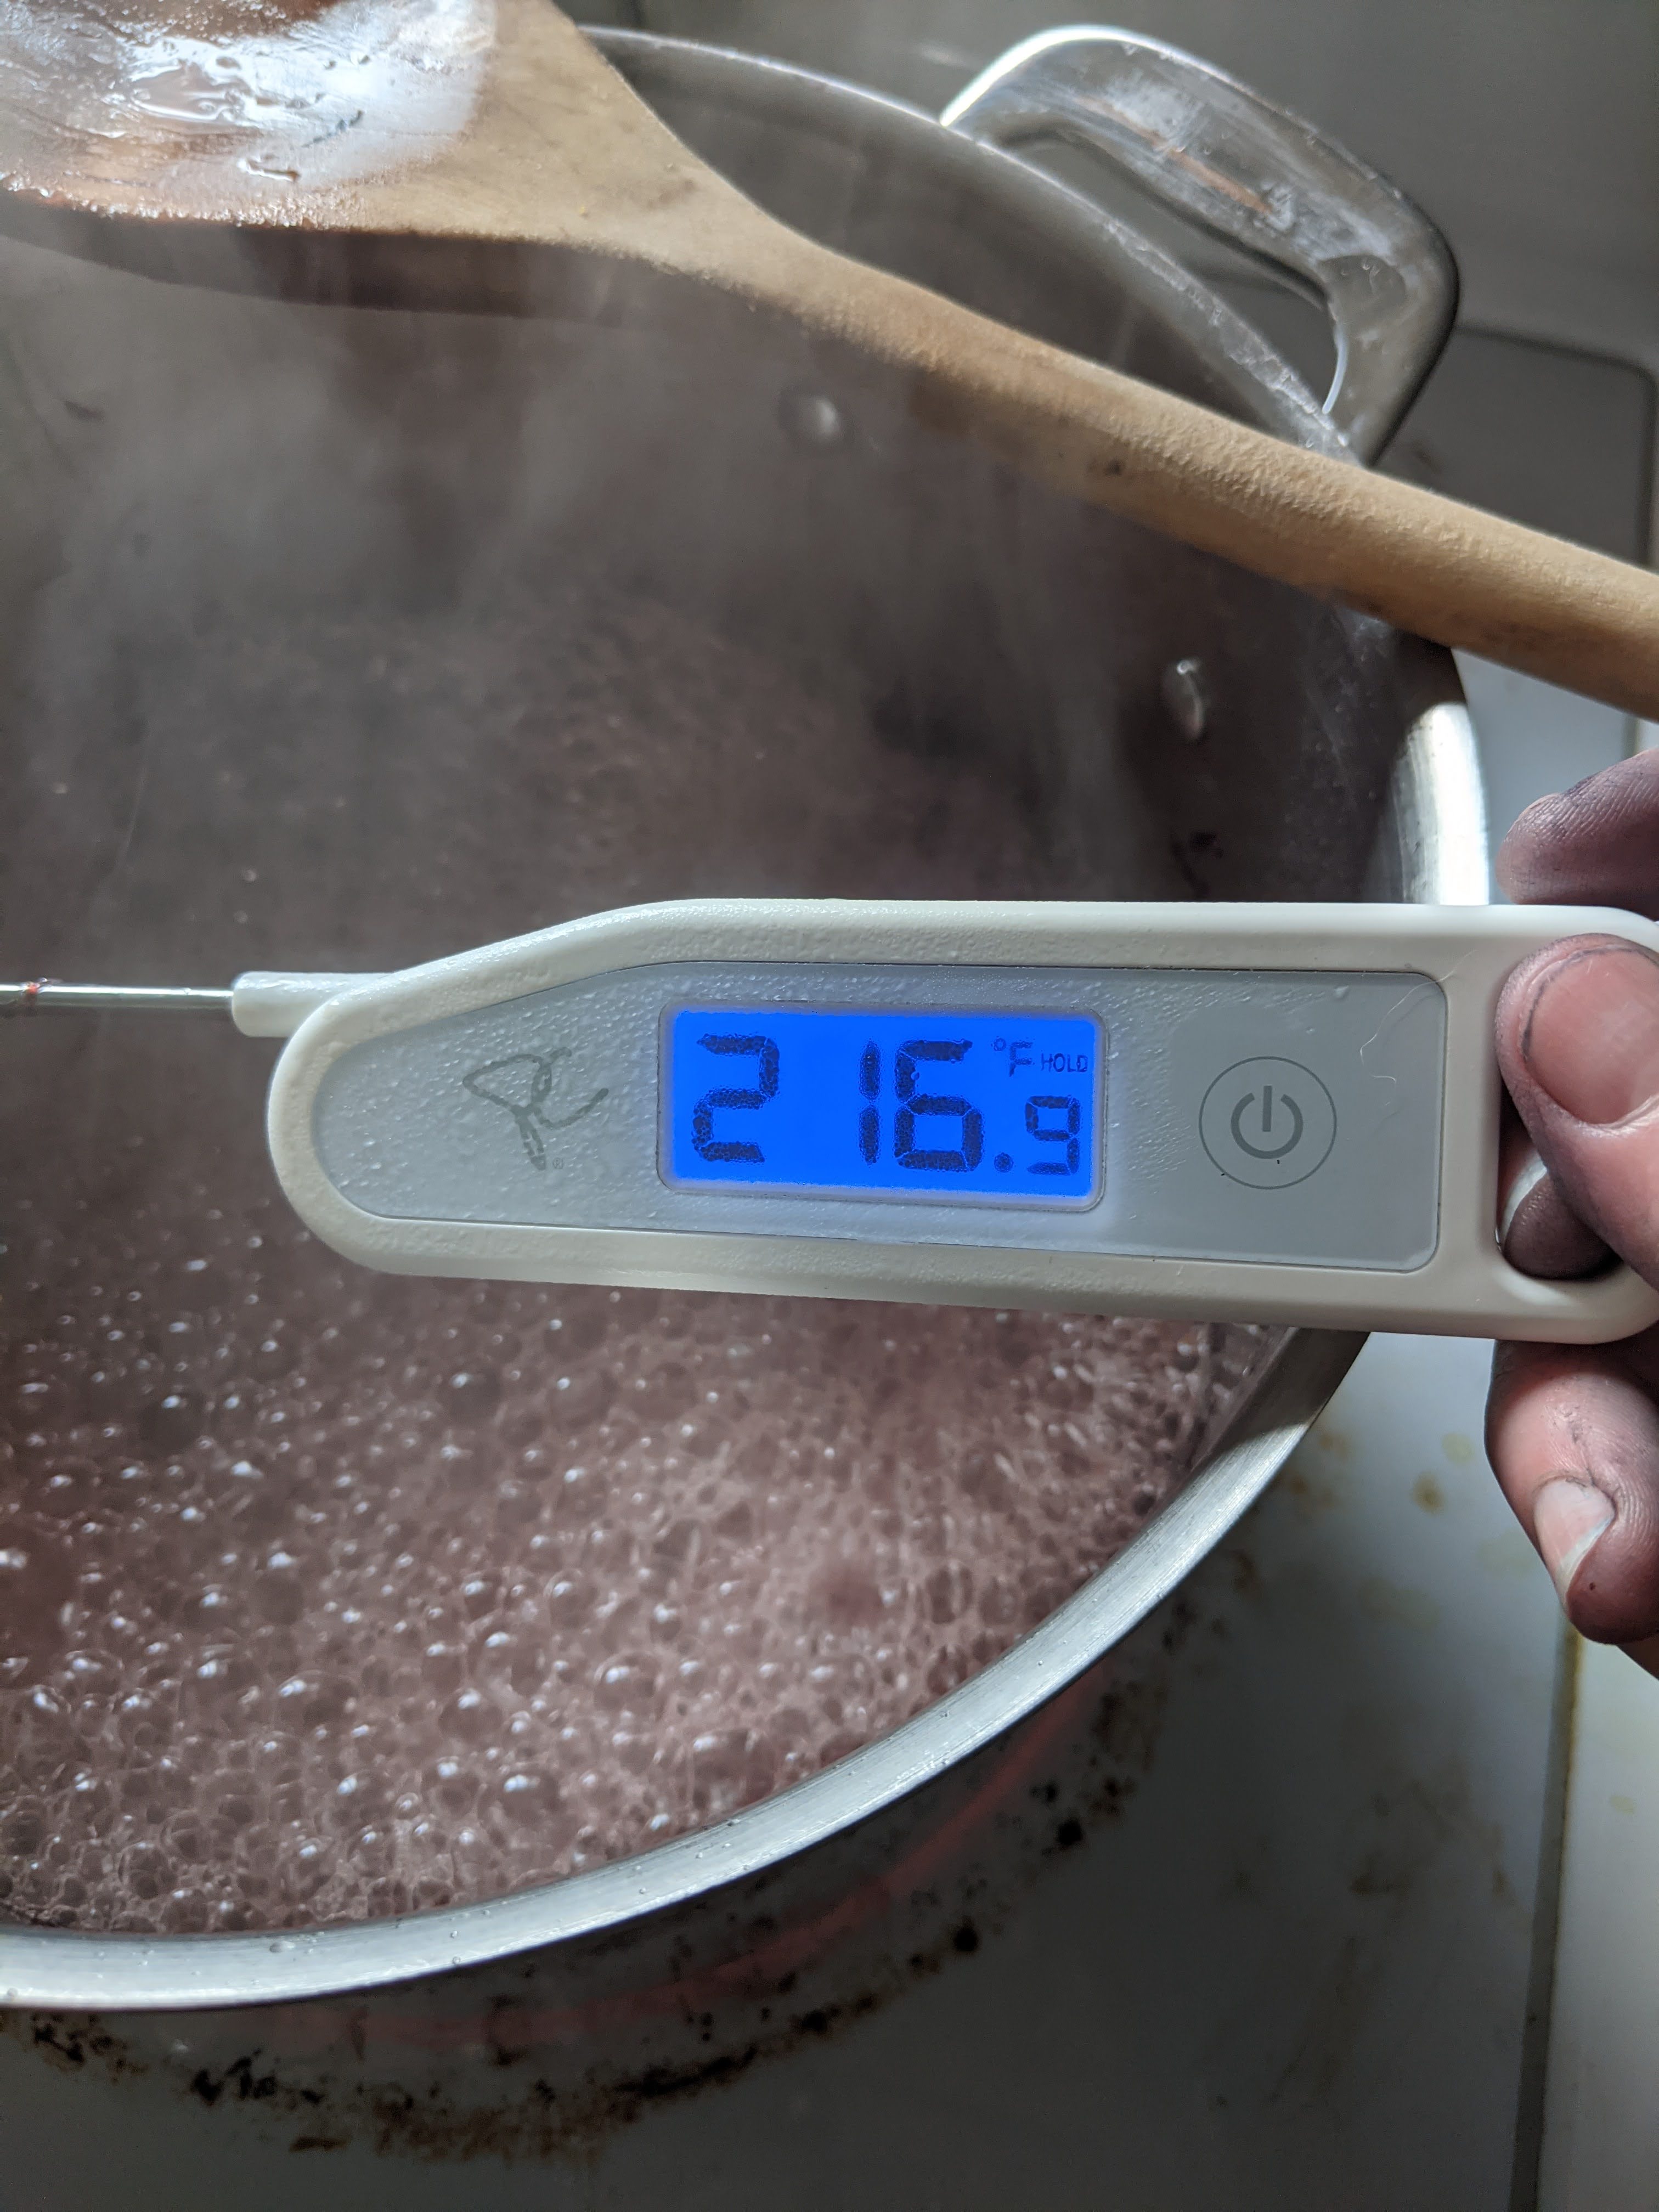
You don’t need a fancy “preserving pan”, much as I would love to own one of the fancy copper ones. I cooked my marmalade in my biggest saucepan — the one I use to cook pasta. I brought the marmalade to a boil, stirring often so that the sugar and fruit didn’t scorch on the bottom of the pan. The marmalade continued to cook and boil, while I got out my thermometer to monitor the temperature. I also put a small saucer in my freezer, for the saucer-set test that Marissa describes in her recipe. Now, most jam/jelly/marmalade recipes will tell you to bring your preserve to 220 F, but that isn’t entirely correct. My home is at about 2000 feet above sea level, and altitude affects the temperature at which preserves “set” or gel. For every 1000 feet above sea level that you are at, you should subtract 2 degrees from the set temperature. So I was looking for 216 F, and that the temperature maintained for a minute, even after stirring. As it cooked, the marmalade thickened and darkened, and the bubbles that formed from the boiling became “shinier”. When I reached my target temperature, I performed the saucer test, by putting some of my product on the saucer from the freezer, and then freezing it for a couple minutes. I was looking for the product to thicken and gel slightly on the cold saucer. If you perform the test, and the marmalade drips when the saucer is tilted, you need to cook your marmalade for longer.
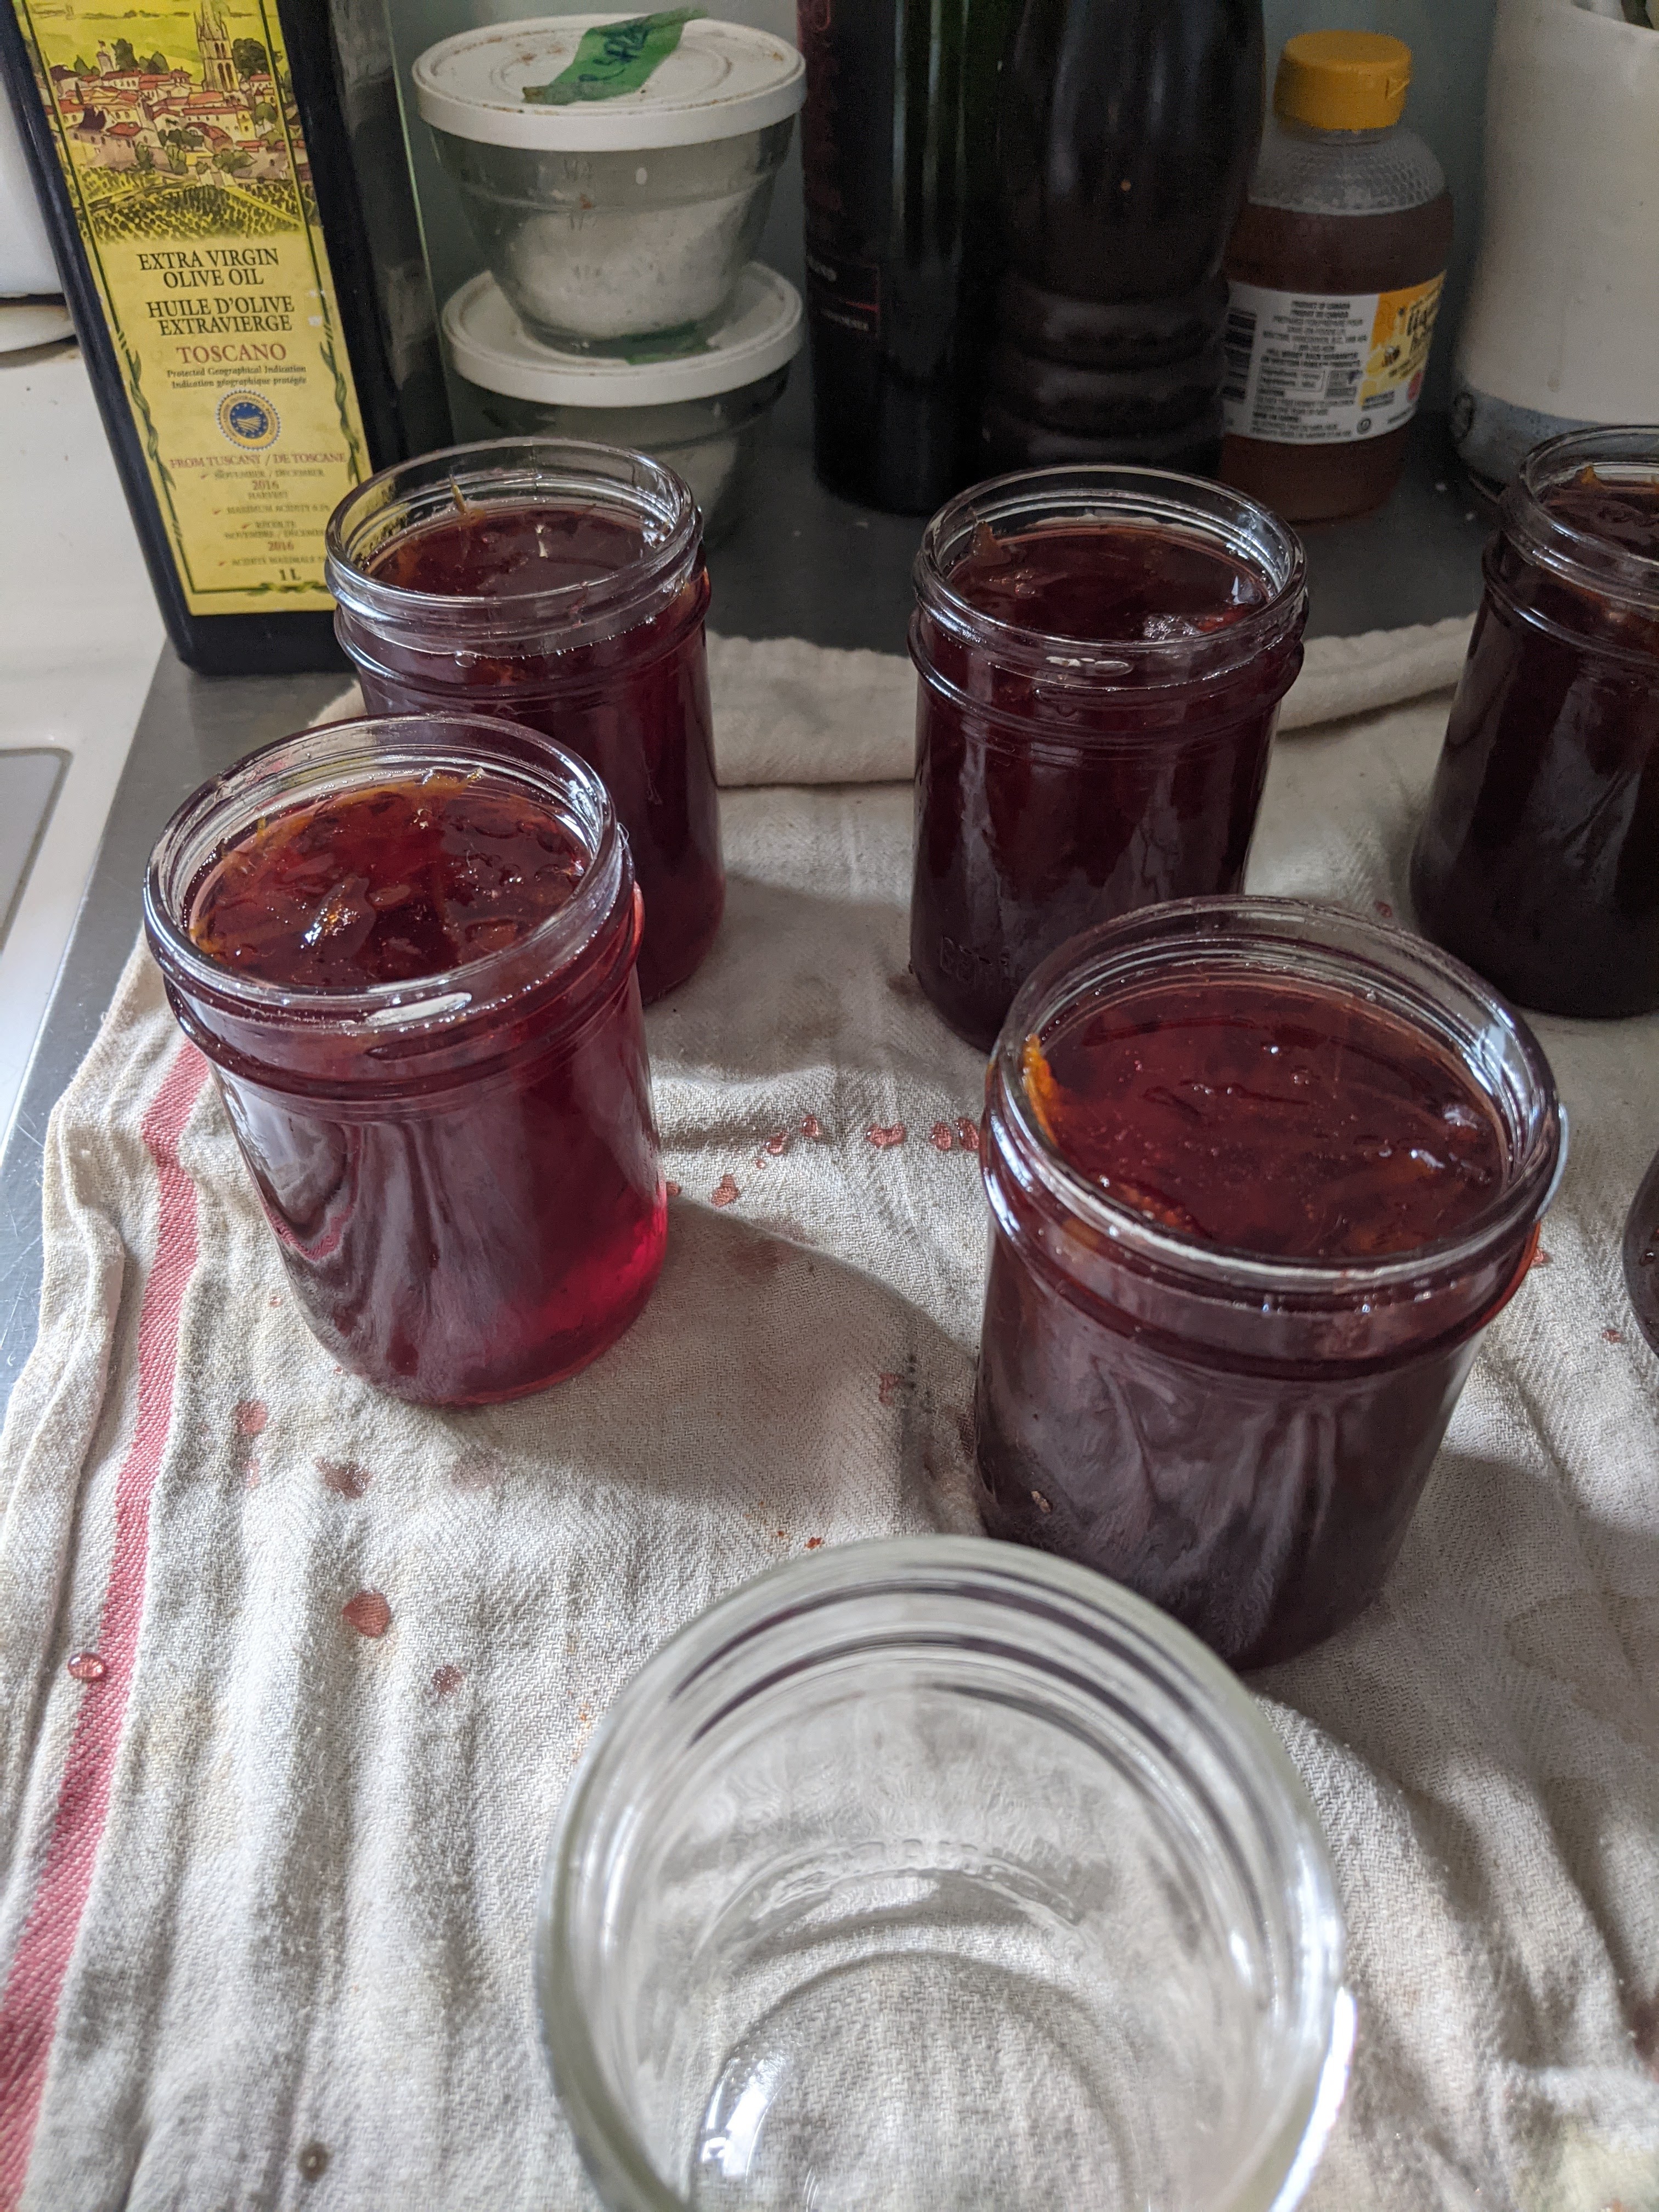
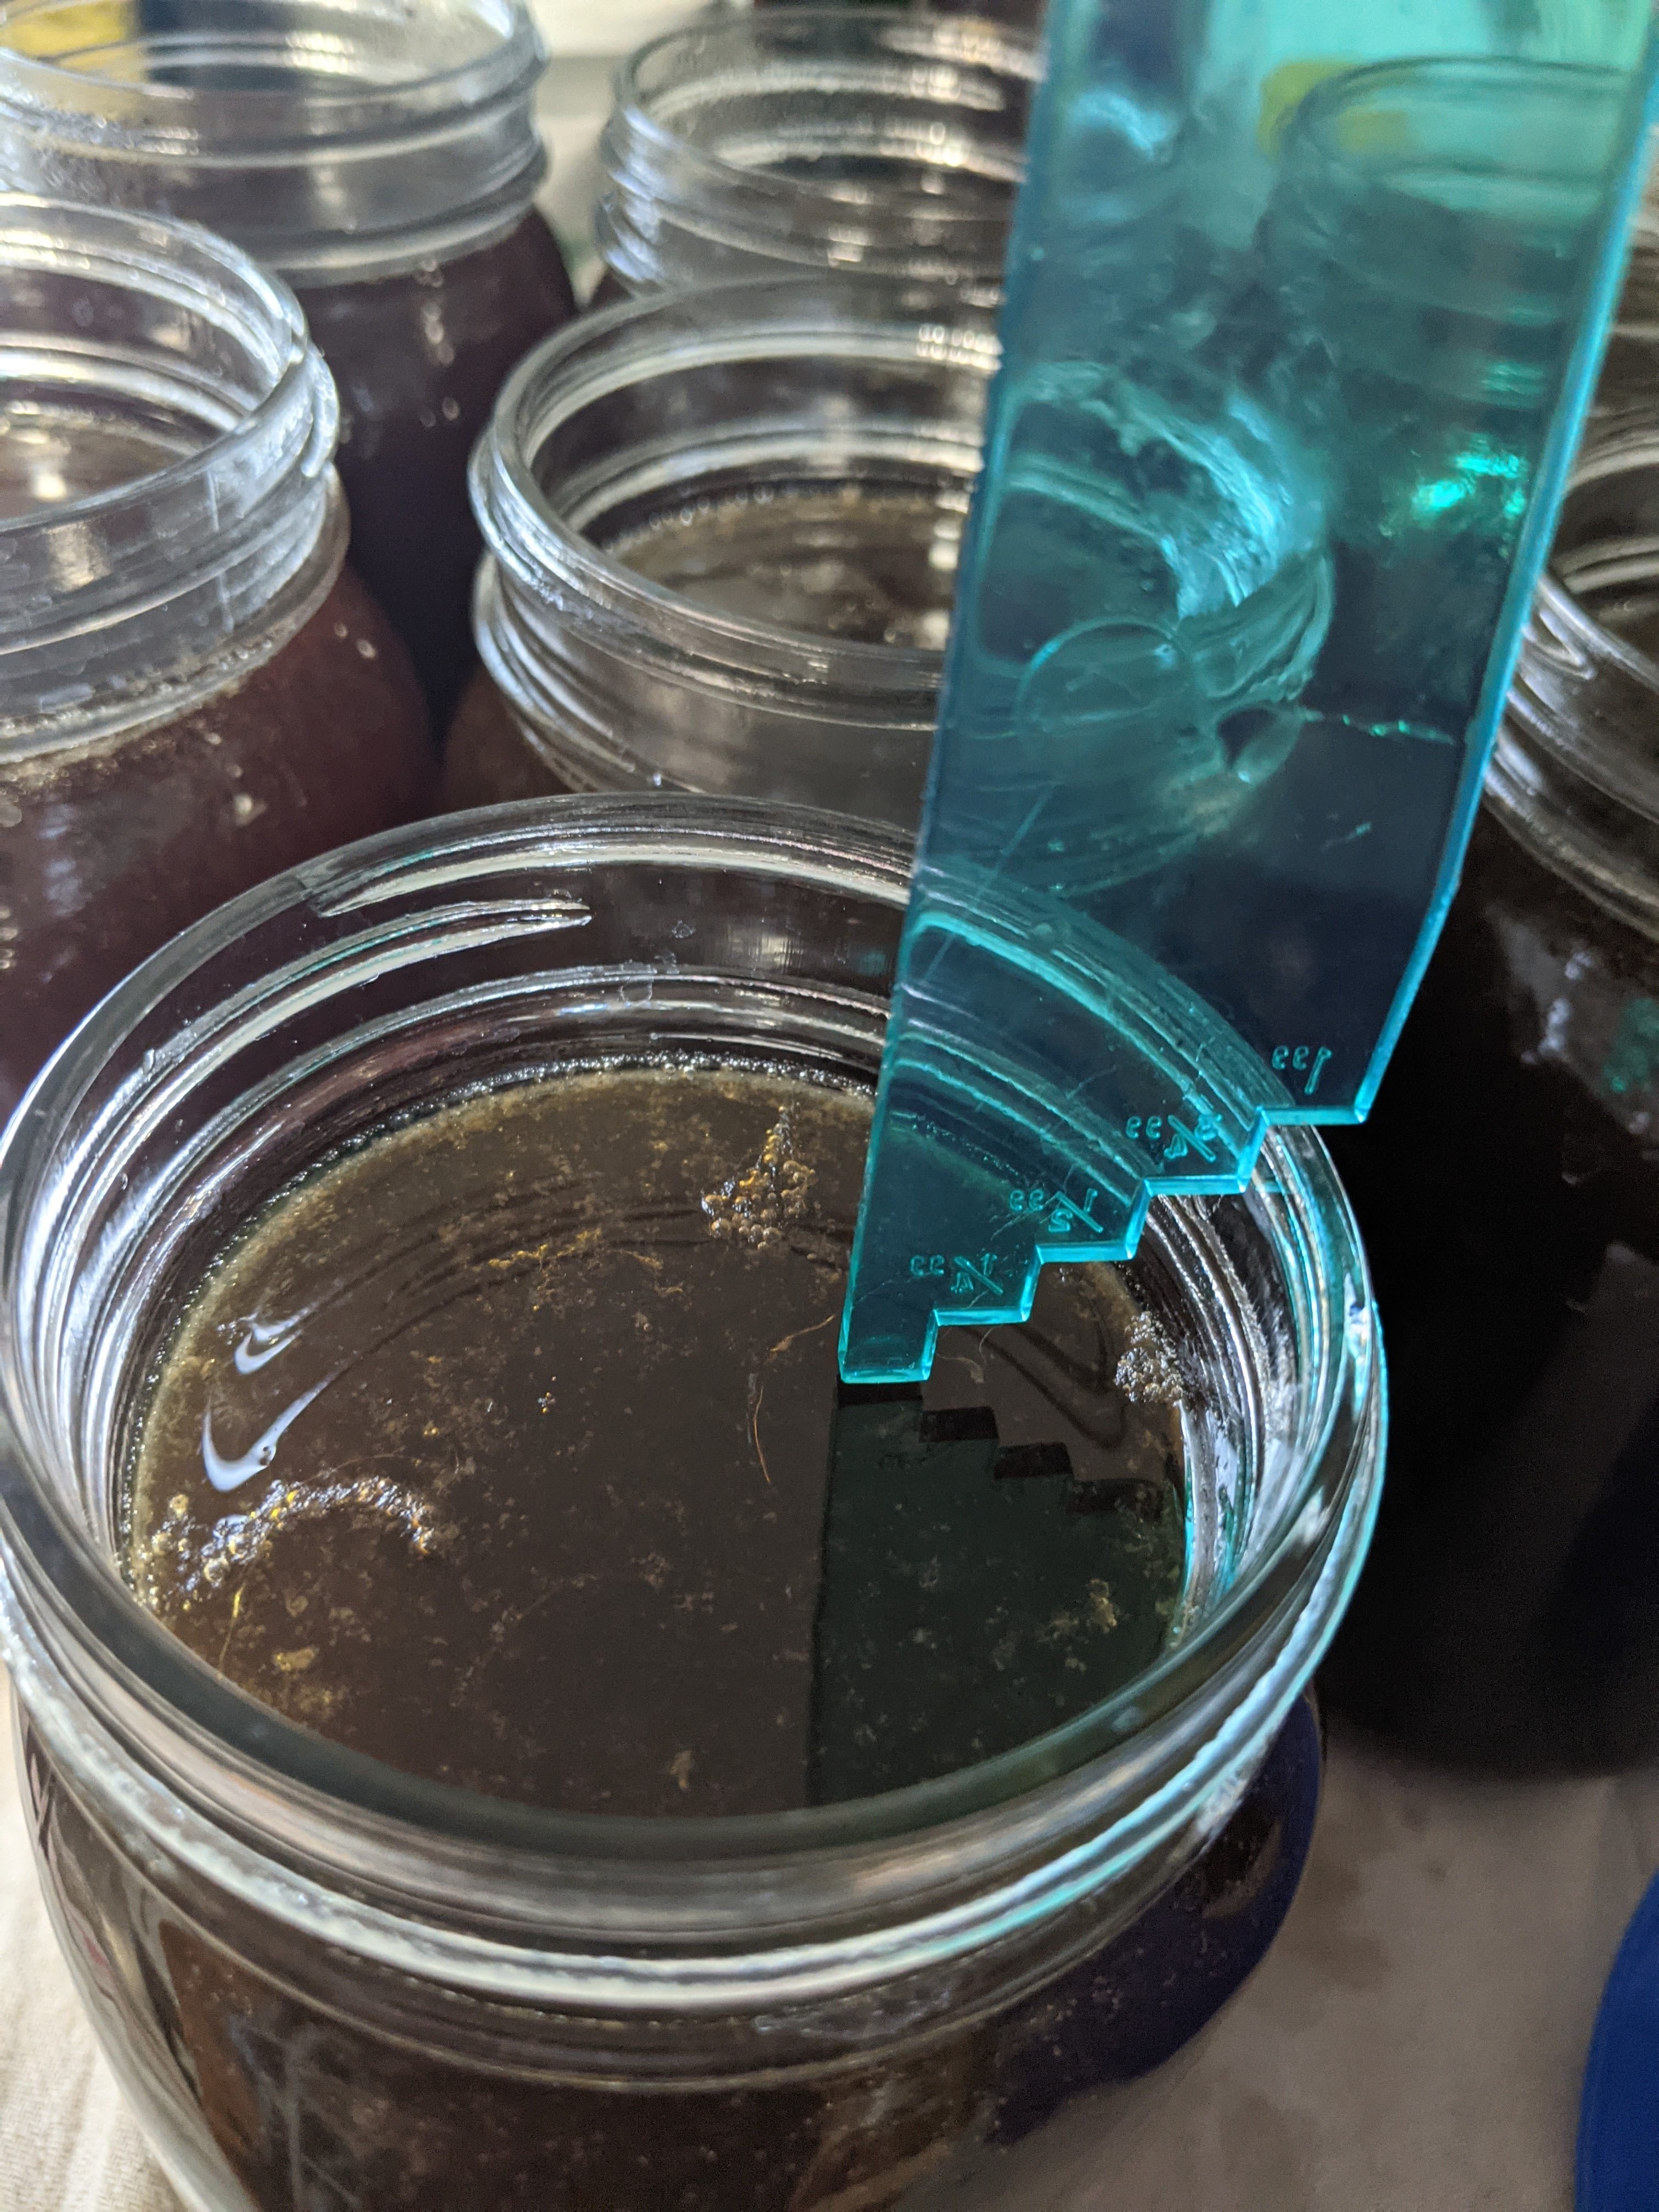
Once my marmalade reached the gel point, I took it off the heat and stirred it well to distribute the zest. I then pulled my sterilized jars out of the canner and put them on a clean tea towel on my counter, ready to be filled with hot marmalade. I use a canning funnel for this, as it’s sooooo messy. Canning funnels can be found with the jars and other supplies in most grocery stores, and they are really inexpensive. It’s actually worth buying a little set that comes with canning tongs and a stirrer/head space measure (you can see this in following pictures). The jars were filled to 1/2″ of “head space”, which is the space between your preserve and the top of the jar. This space is important to measure accurately, to ensure that your jars seal properly. Jams and jellies get 1/4″ of head space, but marmalade is a bit thicker, so it needs more. Then, I wiped the top of the jars with a damp cloth, to ensure that there was no stickiness that would prevent a good seal or provide a breeding ground for bacteria that could get into my sealed jars.
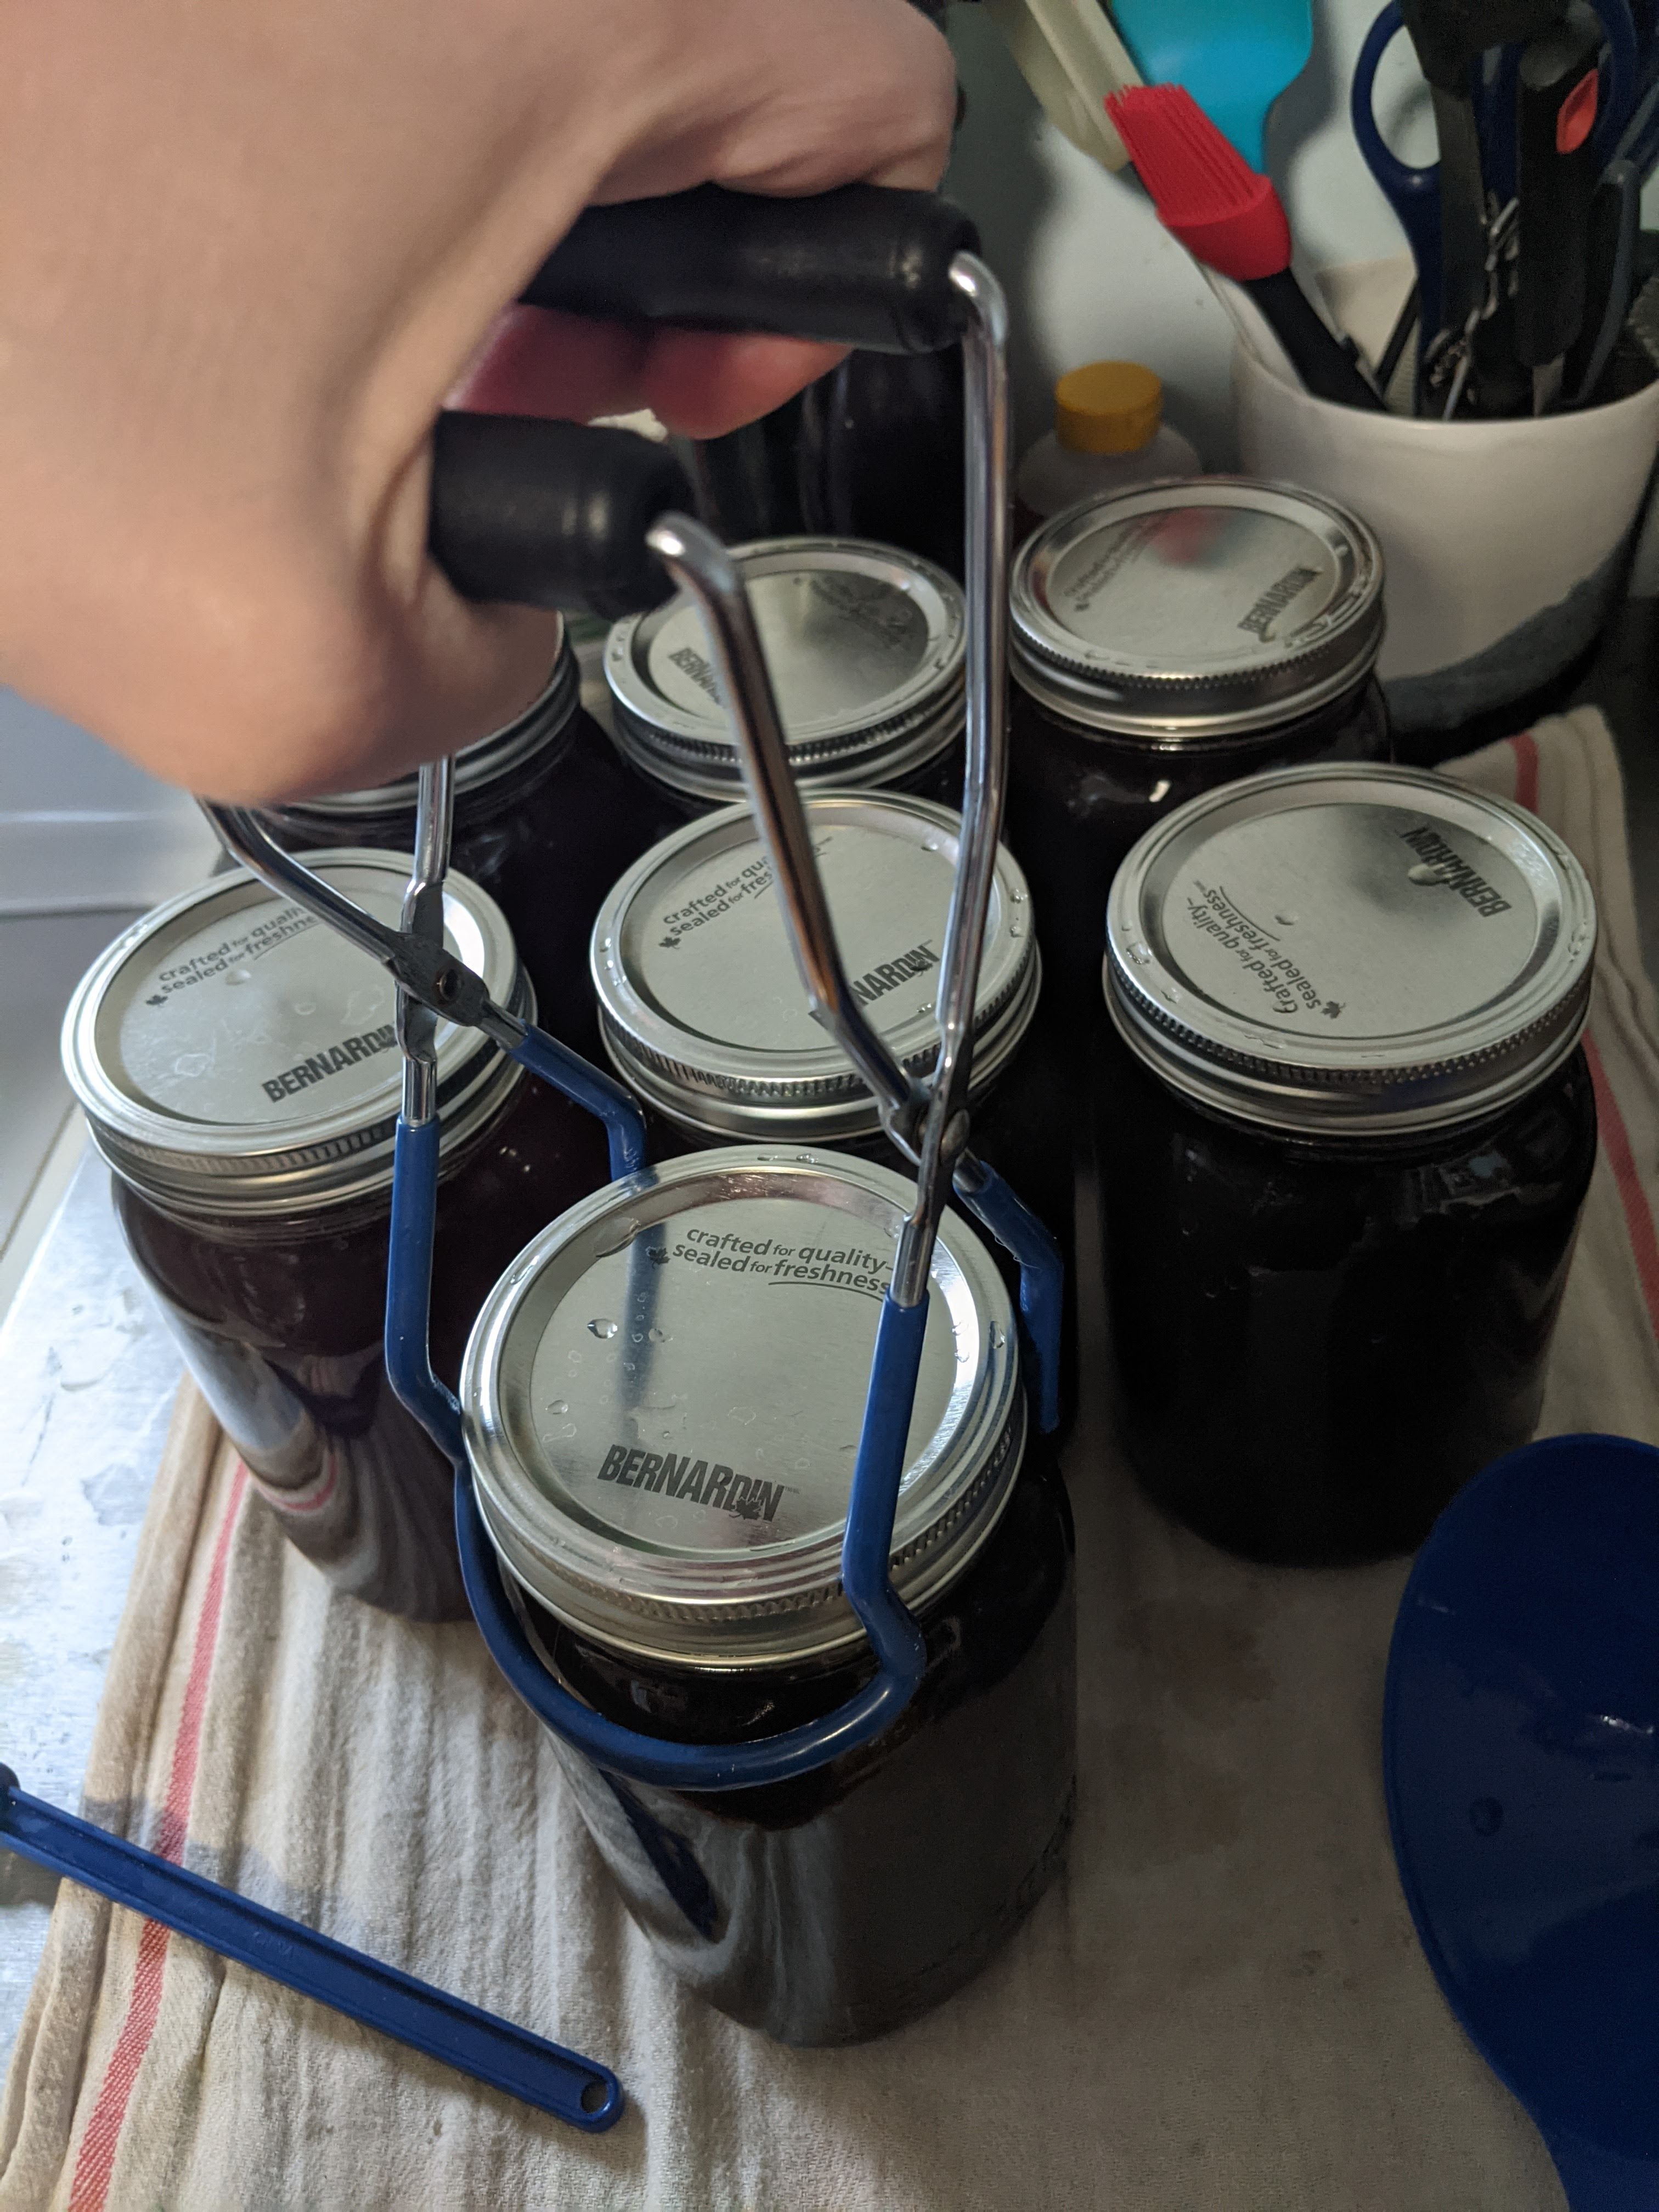
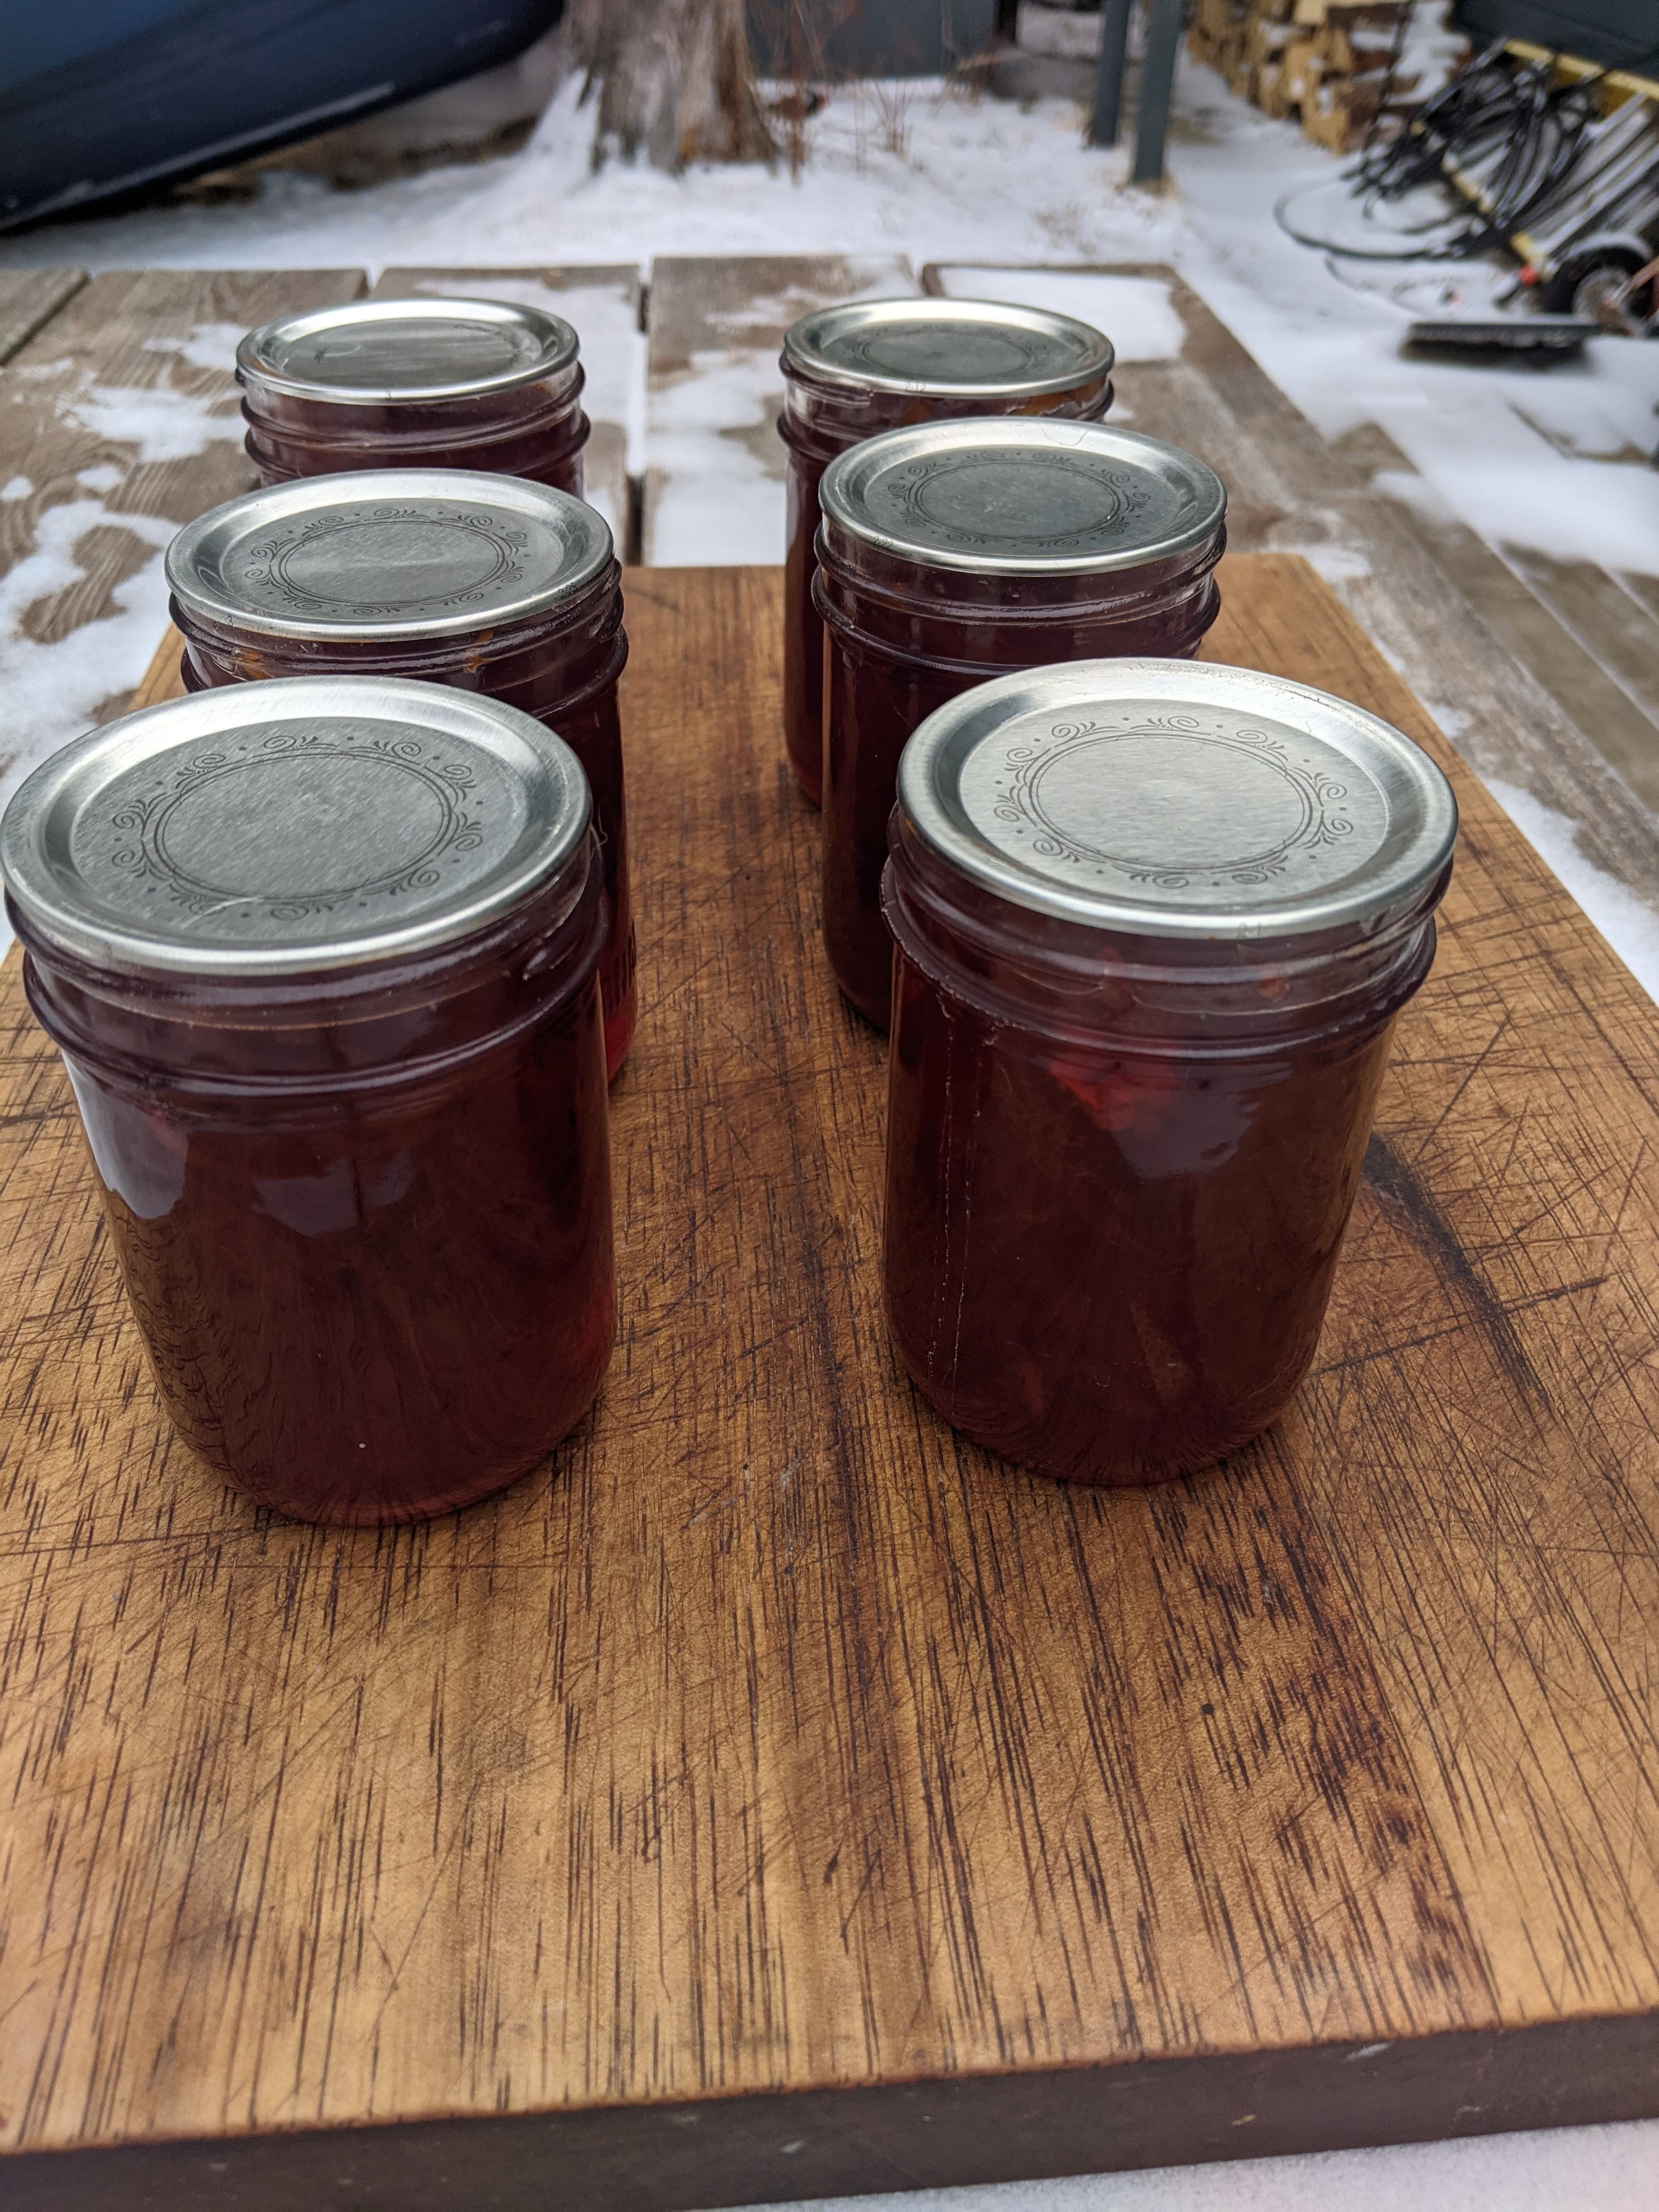
You can see the filled jars in the second picture, near the top of this post. I had just a smidgen of marmalade left over after filling six jars — that became the “cook’s treat” after it had cooled down enough for me to taste. Then, I put the lids on the clean jars and screwed on the rings to secure the lids. It’s important not to crank the rings on too tightly — just “fingertip tight” is what you are looking for. I put the filled jars back in the canner, put the lid on the pot, and brought it back to a boil. Those canning sets I mentioned also come with canning tongs, which allow you to safely insert and remove your jars from the hot water, without scalding yourself.
I listened for the canner to come to a hard boil again, and then set my timer. The recipe calls for the marmalade to process (boil) for ten minutes, but this is another instance where we must take elevation into consideration. At my altitude, I needed to add five minutes to my processing time. You can check the canning authorities I mentioned earlier to find out the adjustments needed for your altitude. The canner must be at a full boil for the entire processing time, to ensure that the finished product is safe to store and eat. Botulism is not really a concern in such a high-sugar, high acid product, but improperly canned marmalade will not be shelf-stable for as long as it should be. And that would be a waste, both of delicious marmalade and of all your hard work! So my marmalade processed for fifteen minutes. Then I turned off the heat and waited a bit before removing the jars. This gives the seals a chance to stabilize before I removed the jars from the pot. Then, all I had to do was wait and listen for the beautiful sound of jar lids pinging as the jars cooled and sealed.
I left my jars to cool, with their rings on, on the counter for a full 24 hours. I didn’t want to risk disturbing the seals on the jars. You know that your jars have sealed if the center of the lid is depressed, and doesn’t make a popping sound when you press on it. There should be no “give” in the lid. After the waiting period, I removed the rings, since they should not be used while your jars are being stored. I like to do a seal test, where I lift the jar up by the edges of the lid only. If the seal holds, you know that the jars are safe to be stored. If one of your jars doesn’t seal, you can try processing it again, but that may result in an “overcooked” taste in your final product. Your other option is to keep the unsealed jar in the fridge, and eat the marmalade up quickly — such a hardship!
I had another reason, besides our own habits, for making smaller jars than the recipe calls for. I love to give homemade gifts, and small jars of preserves make a lovely, inexpensive gift to a friend. While I did have some initial outlay for my canning equipment (which gets smaller every time I can, on a cost/use basis), the oranges and the sugar for this recipe cost me less than ten dollars. I know for sure that I will be sending some of this marmalade to my older daughter, who loves Paddington even more than I do!
I hope that I took a little bit of the mystery and fear out of water-bath canning and preserve-making, for those of you that haven’t tried it yet. I am happy to answer any questions or provide resources, if something isn’t clear. And I would love to hear about your favourite preserves, and any memories you might have about preserving with your families. My next post, I will get into pressure-canning, and that chicken stock that I have mentioned…

And now, I want marmalade. I’m curious: do you ever reserve the pith and seeds for their pectin? When I’ve made marmalade, I have put pith and seeds into cheescloth and a muslin bag and tossed it into the pot along with the other ingredients.
LikeLike
I have used the pith and seeds to boost pectin in other marmalades! It can also be effective to use lemon peel and seeds in jams made from low-pectin fruits. I thought I would start here with a fairly simple recipe, using a commercial pectin, so if a beginner wants to try this out, they have that bit of reassurance of consistent results. It can be really discouraging when your early attempts don’t meet your expectations, you know? Also, the pith on most of these oranges was quite thin, and I only got about 5 seeds total!
LikeLike
Growing up in my first childhood home we had Paddington bear wallpaper in our bathroom. I forgot about that until now.
Reading this post puts me at ease that I’ve been making jam correctly! I’m a rule-follower at heart. I certainly don’t want to get anyone sick. Last summer was my first time dabbling in the world of small batch canning. Although we were very limited in visiting with family and friends I did bring some strawberry lemon (Marisa’s of course) to my parents’ house. They loved it. It was so nice to get a text message with a photo that the jar was empty too. I hope to do more preserving this year. 💕
LikeLike